|
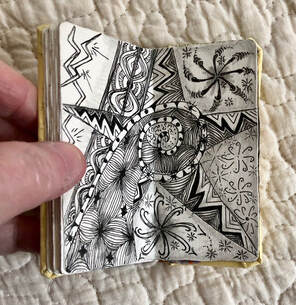
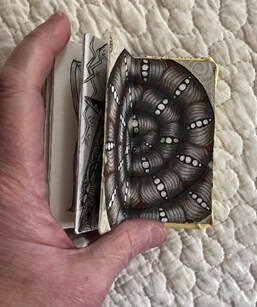
Grid-based tangles are not always my favorite type to draw, so I want to practice them more to see what I think and explore that resistance. The tangle below is called "Krokus" but I added so much to it that it's almost hard to recognize. I'm not sure but I don't think I've drawn it before. 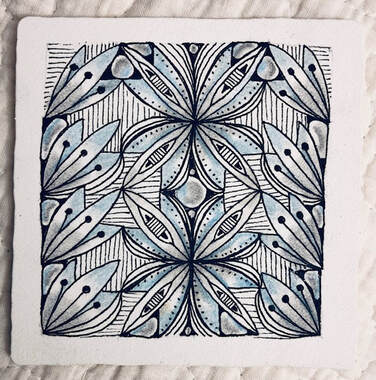 Tangle is Krokus, with a few orbs and some 'Nzeppel and random lines. Black PN pen, graphite, General's Chalk pencil. And now the same tangle, but presented differently below. The grid isn't so obvious in this one. You can see the pencil lines (the "string") if you look, however. 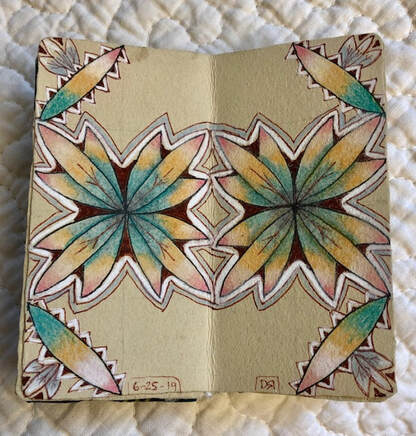 Tangle is still Krokus. On a tan tile, and this tile is actually inside one of my Bitty BookZ™ (see last week's posts if you don't recognize that term). Brown Micron PN and 01, White & blue General's Chalk Pencils, Prismacolor pencils in several colors. I was so pleased at how easy it was to tangle with the tile actually part of a book. While I've been making books at the rate that some of us eat potato chips (you can't stop at just one), I hadn't tangled in any of them yet.
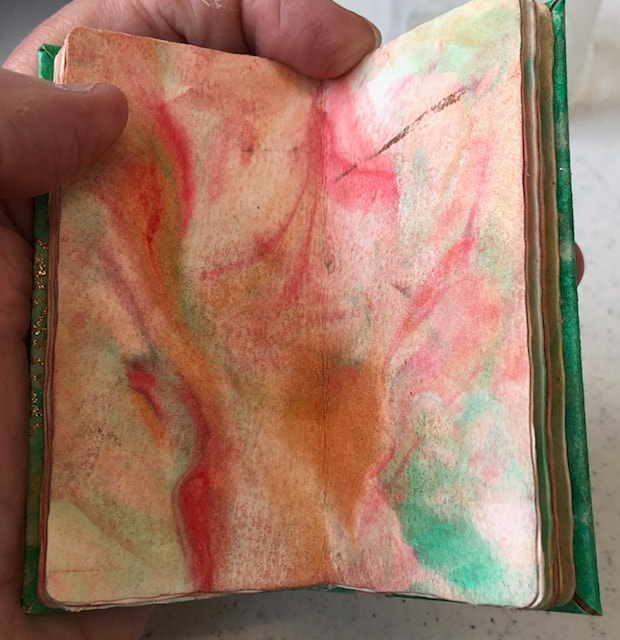
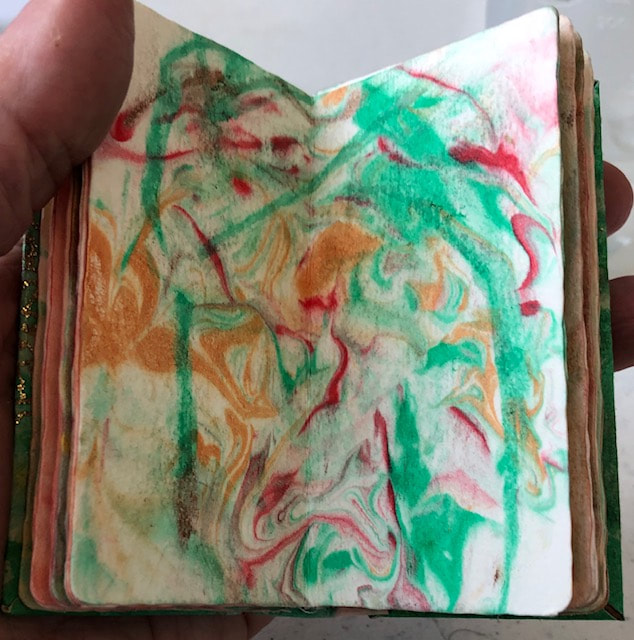
A lovely calming meeting today with rug hooking friends Diana, Lynda, and Judy. 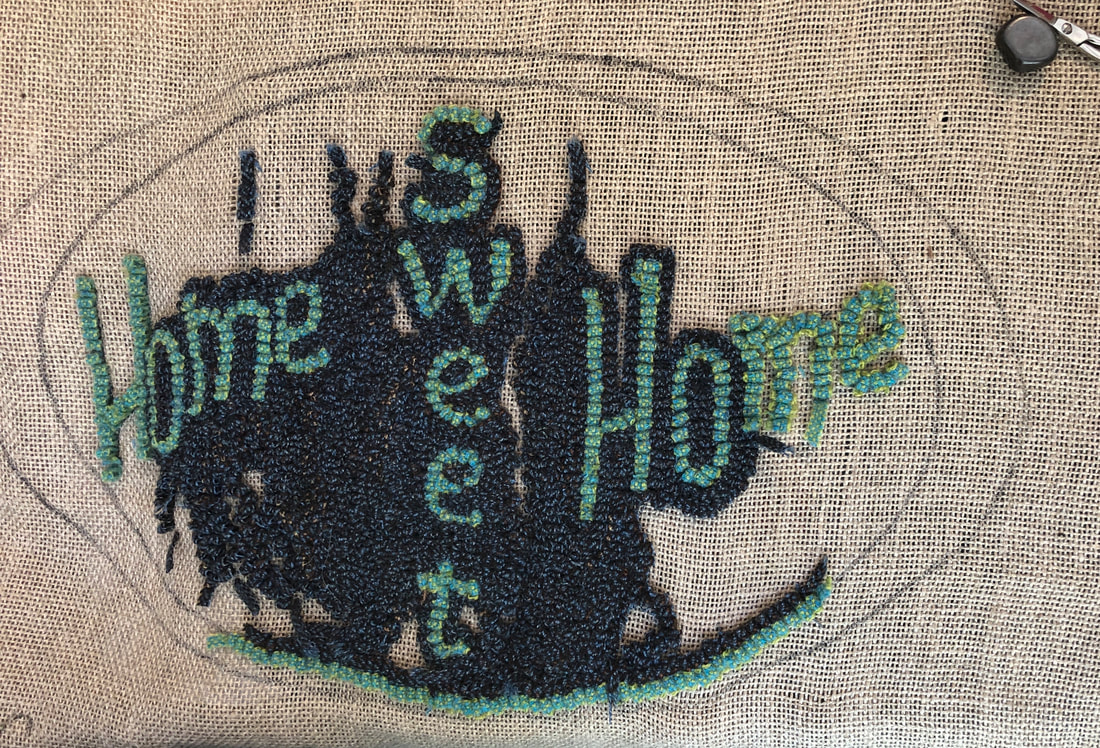 A Liziana creations design, wool on linen. Diana was working on this and it will be for sale in November. It's 11x18". 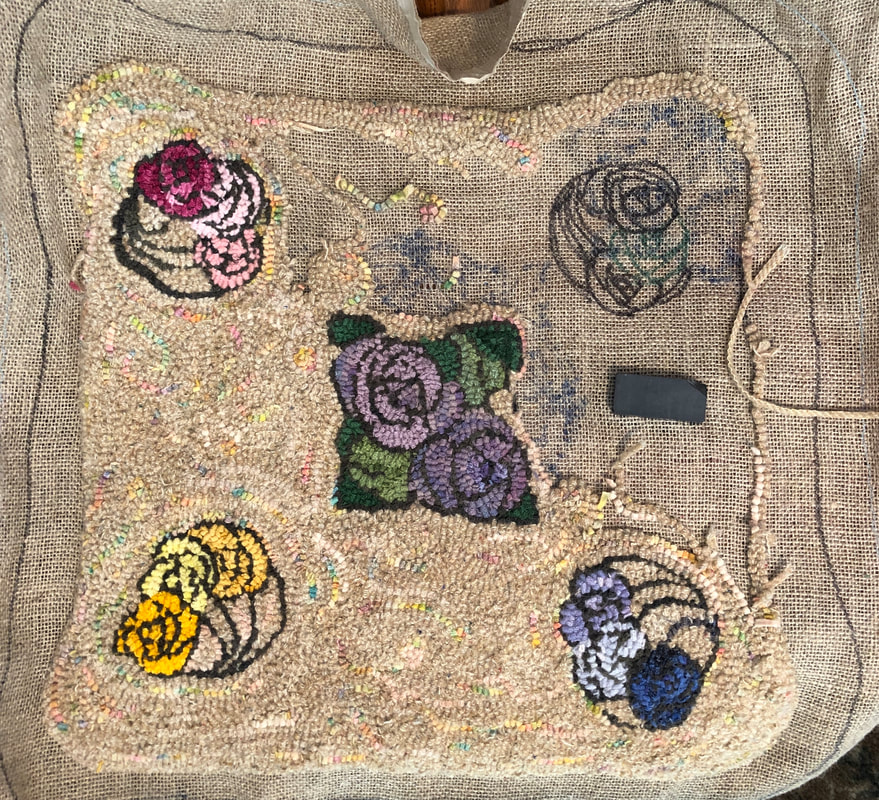 Lynda designed this and it should fit perfectly on the top of a footstool in her house. A simple design made even more lovely by the subtly colorful background. Wool on linen. 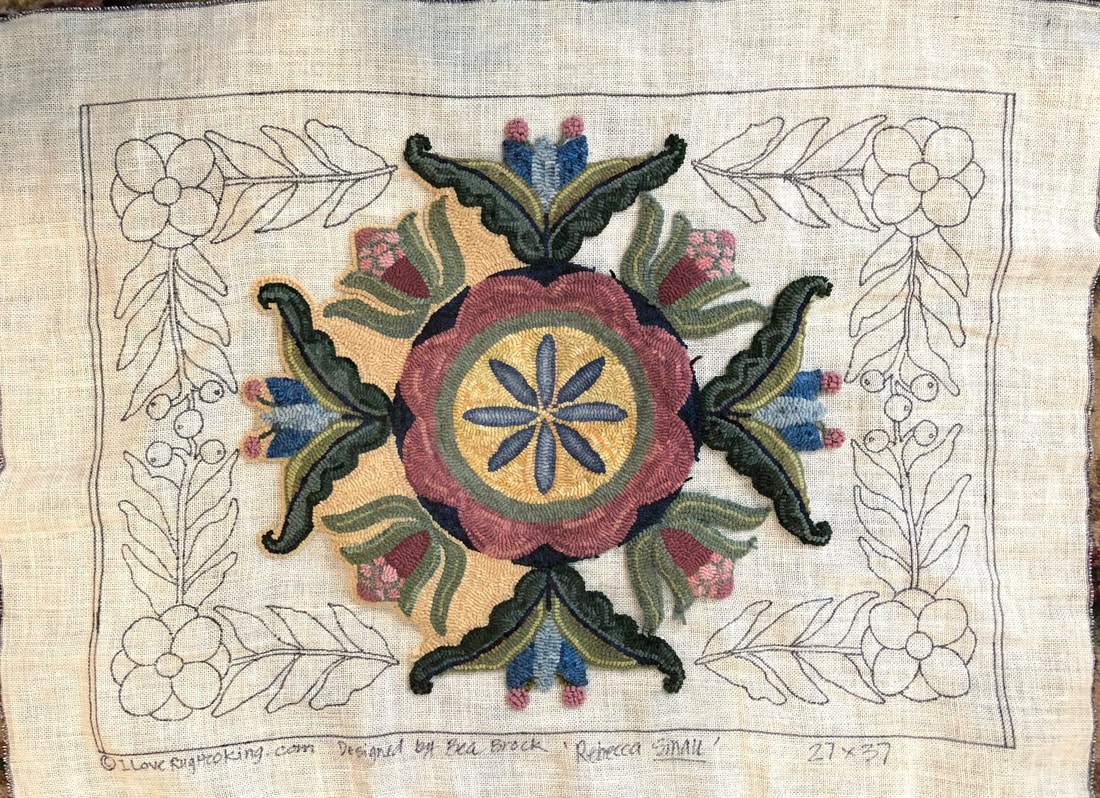 This beauty is a Bea Brock design called "Rebecca Small," 27x37". Colors and hooking by Judy J. Wool on linen. 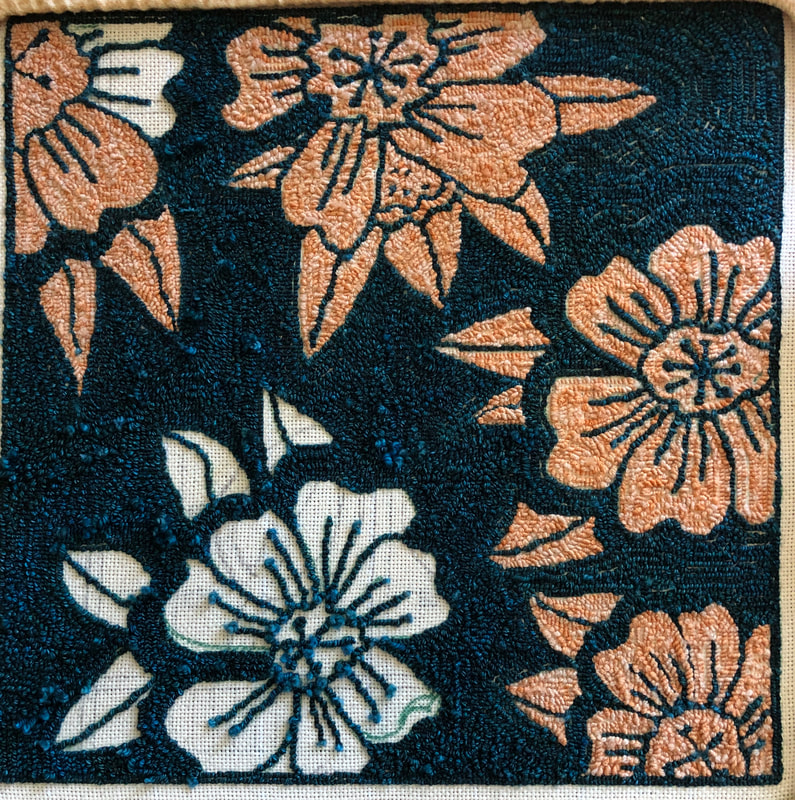 Rug-Punched Pillow in progress; loops that are popped up will be pushed thru and trimmed on the other side. This is my current punch project. Wool on monks cloth. Actually, make that utter shock. I went to Elaine Huffman's studio today for a "Bitty BookZ™ maker event," thinking I would pick up a lot of tips from those more experienced. Imagine my surprise when I discovered none of the other 5 participants had ever made a bitty book. I was even more surprised to end up in the role of teacher for this group. Without any planning or rehearsal. ("Planning" and "Rehearsal" are my two middle names.) Elaine could have taught the class--but she gave us her studio for the day plus fabrics and all the other supplies...and while we worked, she was madly cutting things for us in the background. Without Elaine, none of this would have happened. So what did happen? This: 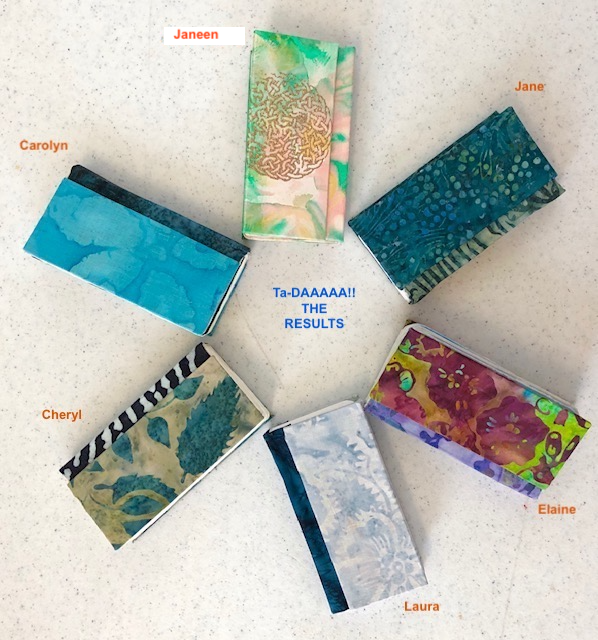 These are the finished FIRST-EVER BOOKS from all five participants, plus Elaine's. Pretty impressive! And below is a view from the side, so that you can see them slightly open:  These are just stunning. What a talented group. See below for a couple of pictures of the books as they move thru the stages of creation: 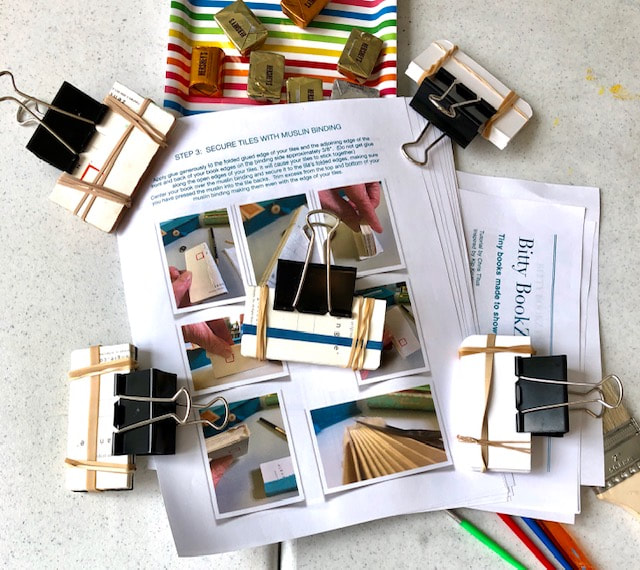 First stage with the tiles just glued together and clamped for a bit to dry. They are sitting on Chris Titus's helpful pdf of directions. See below for where to get her pdf if you would like to try one. And yes, those are chocolates at the top of the photo. Surprisingly, people were so absorbed that I never saw anyone eat one... On to the next stage: 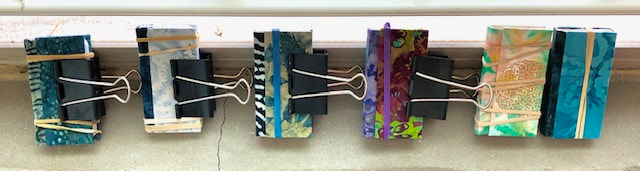 Nearly finished books on the windowsill in the studio, clamped & "elastic-ed" in order to dry. Nearly finished books on the windowsill in the studio, clamped & "elastic-ed" in order to dry. And here below we have the entire group after their books were dry and we got to un-clamp and un-elastic them. From left to right are: Janeen, Jane, Carolyn, Cheryl, Laura, and the scamp at the bottom in the violet shirt is Elaine herself. Elaine deserves huge applause for enabling this to happen. 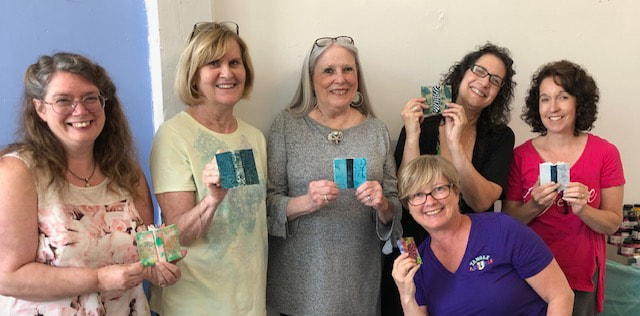 Interested? If you'd like to try it yourself, you can get Chris Titus's very helpful pdf describing what supplies are needed and how to do these from start to finish. Click HERE to get the pdf ($10 US funds...well worth it). You really CAN do this without a class, just from the pdf. Take it slow, expect some mistakes along the way, and don't expect perfection from your first one. But by the time you make the 2nd one, not only will it go faster, but you'll have it totally figured out. Meanwhile, Janeen (a Certified Zentangle Teacher from Seminar 3!!!) filled her Bitty Book with ten of her own paper pages which she had made using the ever-popular "Shaving Cream" method of coloring and marbleizing the paper. It's all over YouTube--just type in shaving cream + paper. Here are a few of her tiles (now inside her beautiful book):
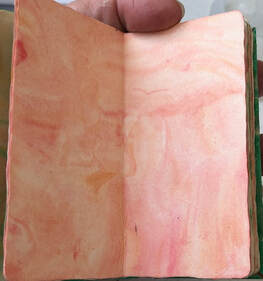 Just waiting to be tangled! Janeen had a funny story about wanting to show her grandson how to color papers with the Shaving Cream method. Except, her grandson had been doing it for years in his school and HE ended up giving HER tips and hints.
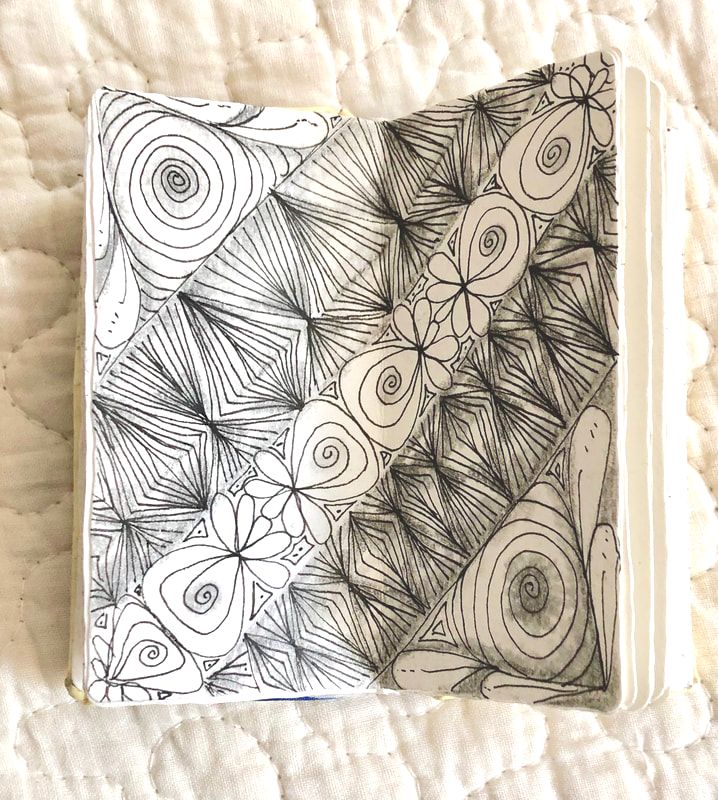
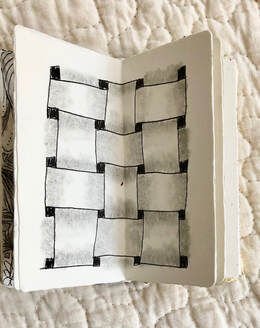
Of course, you can use plain white or black or tan tiles for your own book, or you can take your already-completed tiles (ones you've already tangled) and use those for your pages. The possibilities are endless. There is a Facebook page for BittyBookZ (oriented towards people who do Zentangle®); it's a closed group but you can ask to join if you want to join the fun. 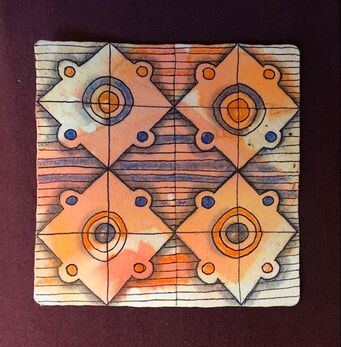 Same tangle as yesterday's post, Haf n Haf, with each square turned a different way (and a few more lines too). Same art tissue paper used, so the colors are lighter and I didn't cover the entire tile.
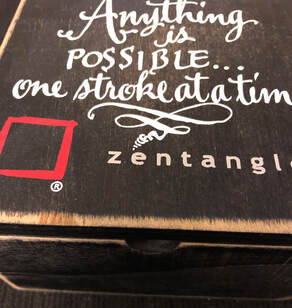
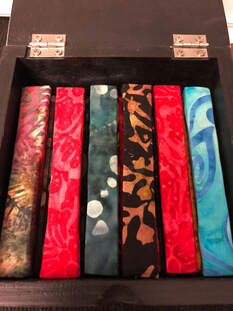
I added a bit of colored pencil in spots and a bit of graphite for shading. Yesterday's tile had neither shading nor any additional color. Life is 'trying things to see if they work.' --Ray Bradbury 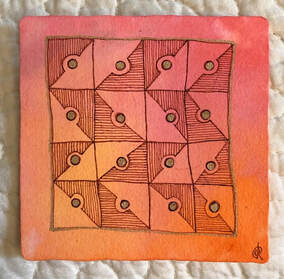 This tangle--really a fragment--is called Haf n Haf, by Dennie York CZT. It has endless possibilities depending on which way each square is turned. I wanted to practice it so drew this very wonky grid on a tile I had colored by first wetting it and then pressing various shades of art tissue paper on it. (Note to self: have hand soap at the ready in the future!) Later I re-used the same tissue papers and got a similar color on another tile, just lighter. I will be experimenting more with this tangle so you'll see it again. That was the "experiment" part of the title of today's post. Now for the "compassion" part. Today, this bag (see below) arrived in the mail from my talented friend and sewer extraordinaire, Kate Lamontaigne of Kamala Boutique. I bought it online a couple of days ago; all the money went to help Travis Barone, a kid who had an unexpected brain event about three weeks ago when he was 17 (I think he has just turned 18). His mother is Kelly Barone, a much-beloved CZT (Certified Zentangle® Teacher). Travis was originally paralyzed from the neck down but I think he's regained the use of his upper torso/arms/hands. He has a very long recovery ahead. Hopefully he can get back all of his former health, but I don't think anyone knows at this point. Kate made 50 bags--each in a different fabric--and sold them with all the money going to Kelly and Travis to assist with his recovery. I love the bag! And the fabric I chose is a tangle-like pattern. A great way to support Travis and his mom. To see if Kate has any bags left, go to the link for Kamala Boutique above and ask her. To contribute to Travis's recovery, go to the Go Fund Me page set up for him. 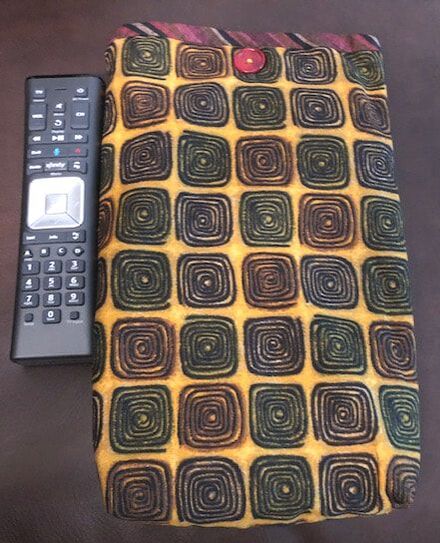 (The tv remote is there to give a sense of size) Made by Kate Lamontaigne of Kamala Boutique, link in the above text. (She has other bags but they are all in different fabrics. I think this one was unique.) The top of the 6-sided box I've been working on is finally tangled, and I've sprayed the entire thing with fixative. All that's left is to add a button for closure. Here's the top. 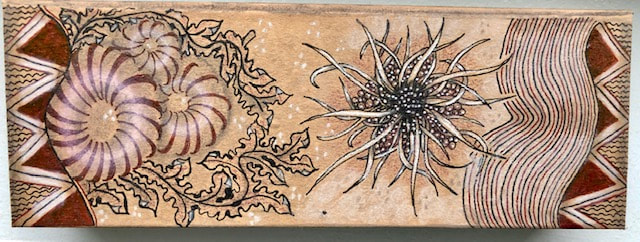 I went outdoors after dark last night and was mesmerized by the bountiful fireflies everywhere in my front yard. Although I hadn't meant to, I stayed for over half an hour watching them as they danced in the dark. So very lovely. In their honor I added some white dots in the background on the top of the box, and also some dark dots on the right side of the top which is lighter in color. To view a quick, lovely video on fireflies dancing, go HERE. Don't miss it. The box, which really isn't that big (perhaps 8" x 1"?) took forever to tangle as I worked my way along all 6 sides. The paper actively resisted the ink, and it was awkward to tangle because of the shape. But I think it will be quite functional as soon as I add that button. I won't be making another one soon, however. *** Yesterday must have been a good day for me as I also finished a Bitty BookZ™ version for Zendalas (see the last few posts for the link to more information on Bitty BookZ). Here is the final result on that. I'm quite pleased. 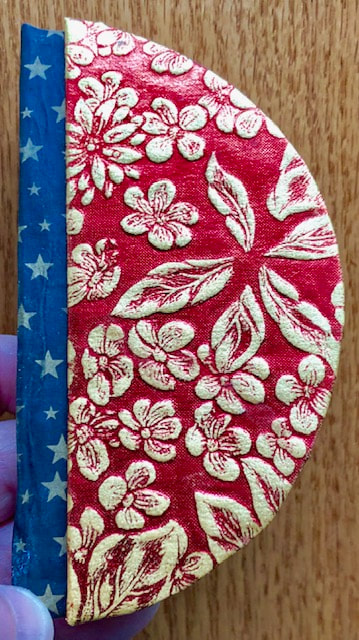 Zendala Bitty BookZ™ with paper binding and covers. Ten Zendala tiles are folded in half inside. I'd better get busy tangling! 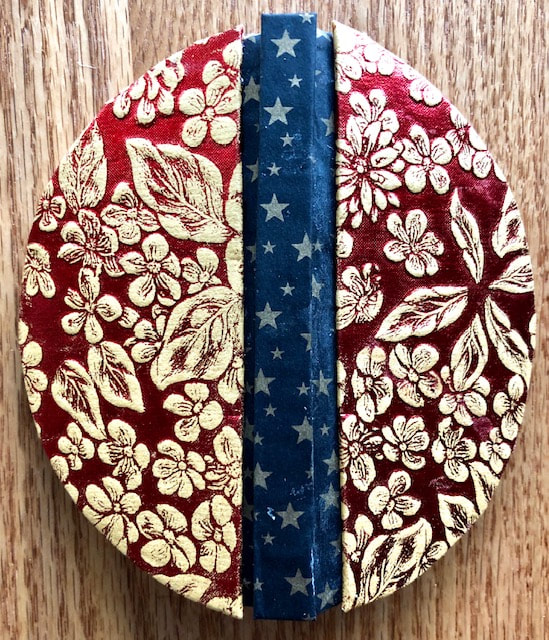 Showing the book placed face-down and open flat. “Catch fireflies in flight, crinkle grass under your toes and know that you are always beloved always beautiful .... a dream within a dream.” 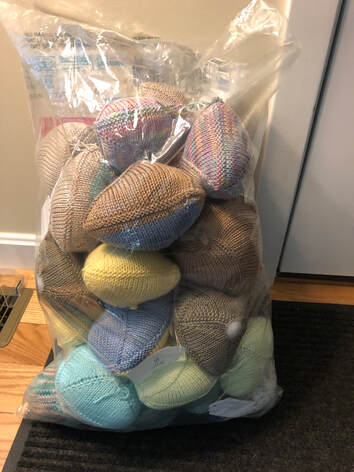 Hand knitted "Knitted Knockers" ready to be given away. 100% cotton, stuffed with high quality polyester. Hand knitted "Knitted Knockers" ready to be given away. 100% cotton, stuffed with high quality polyester. THE FIRST THING: To the left you'll see a Bag of Boobs. Yes, boobs. Breast prostheses, that is. I knit them for the Knitted Knockers organization and supply them to my local hospital's mammography and medical oncology unit. They emailed Friday to ask for another batch because "women love them." I was so happy to hear it. I knit in the evenings while I watch the news or a tv program. I cannot watch tv without doing something with my hands, and this has forever solved that problem. Because breast cancer is so common, there's an unending need for these prostheses for women who've had a mastectomy. THE SECOND THING THAT STARTS WITH B: THE BOX 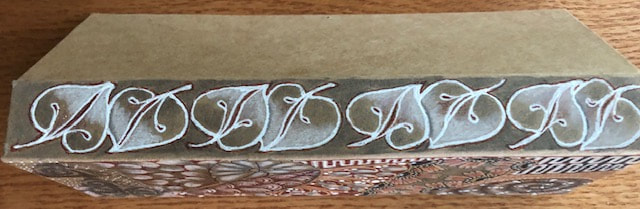 Here is the back spine of the box (I posted a picture of the bottom of the box a few posts back--you can just catch a glimpse of that underneath the narrow spine above). And above it you can see the as-yet-untangled top of the box. The tangle on the spine is Toodles. Done with white pen, colored pencil, graphite, white chalk pencil.  This is the front spine of the box. A version of Henna Drum and other lines and dots. All the same tools as above, along with Brown & Black Micron 01s.  This is one side of the box (both sides are the same). So now only the front of the box is left to tangle. Surprisingly, I am not enjoying tangling on this box one bit. The underlying structure is probably chipboard or something equally hard, and the brown paper covering is not porous at all. The combo makes it very challenging to tangle on--it's as if the paper wants to reject the pens entirely. Hard to get the ink out! Plus tangling on tiny narrow surfaces that don't support one's hand is a real challenge. The combination of pen-rejecting paper and no hand control is making this a difficult project. When I'm done I think I'll love the box, but I sure don't want to tangle another one. Live and learn! Oh, I am having way too much fun making these. I've made seven in the last two days. Fortunately I'll be busy with other obligations the rest of the week and am forced to stop. 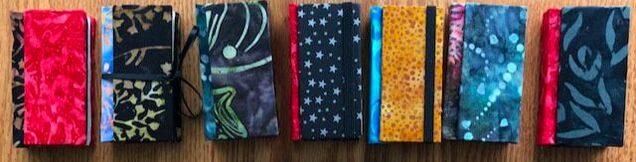 These books are 1.75"x3.5" (4.4cmx9 cm approx). Cloth, paper, glue, chipboard, and some have ribbon or elastic closures. 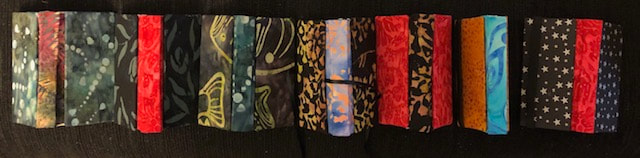 Here are the books with covers opened and spines exposed. When fully opened, they're completely flat and should be very easy to tangle on. I can't wait to try. Someone online pointed out that these Bitty BookZ™ fit well in the old (no longer available) wooden box with the Zentangle® motto on the front. I've never known what to do with this box but this answers the question. I love it as a storage container.
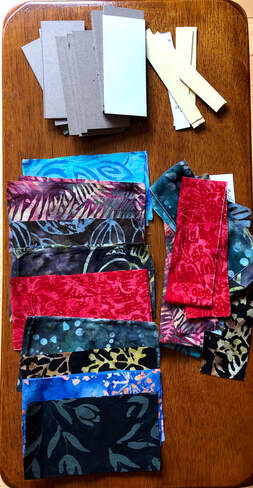 And finally, this was some of the pre-book binding preparation mess. All cleaned up now, thank goodness. I'm not the only one obsessed with this, but wow, it took over my life this week! "It is surely a great calamity for a human being to have no obsessions." --Robert Bly Just what I need. Another hobby. Oh sure. The only way I can justify this one is to say that I'm surprised at how well these things actually show off Zentangle® tiles. Or would if I ever got good at making them. Today's version was so badly bungled that I won't even go into the story, but it turned out sort of ok. I made the most of what started out as a "right-royal mess," as my friend Vivienne used to say. 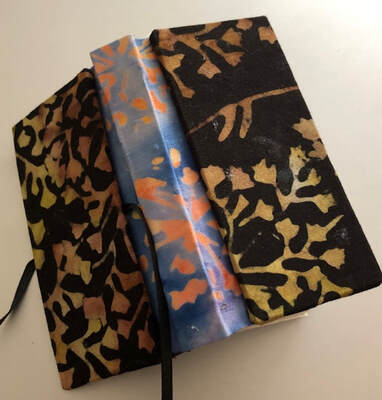 My 2nd try at this. 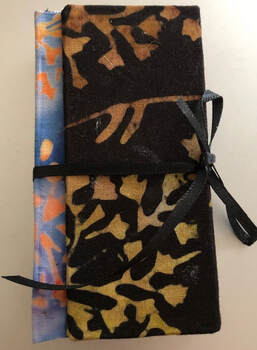 I added a simple ribbon. Easier than I thought it would be. 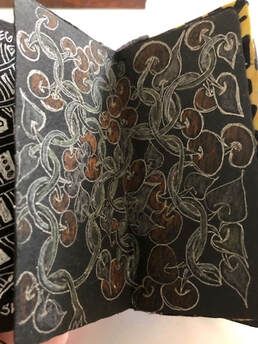 Just to show how the tiles look in the book (the book actually lies flat quite well, but it was still damp when I opened it to take this photo so I decided to allow it to be only partially open). This is a tile from January of this year. Not only that, but a bunch of cotton quilt scraps arrived in the mail from my kind friend Elaine J. Huffman. Free! And mostly gorgeous batiks. She is clearly enabling this addiction. Thank you Elaine...I have 4 more books in the works already, thanks to your gift. Clearly it pays to know a talented quilter. See below. 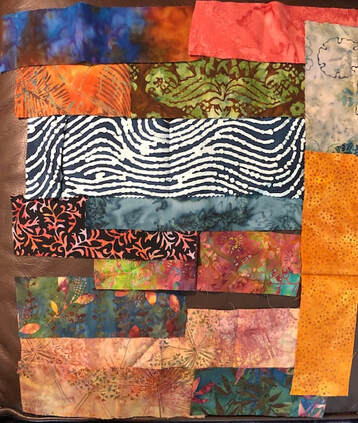 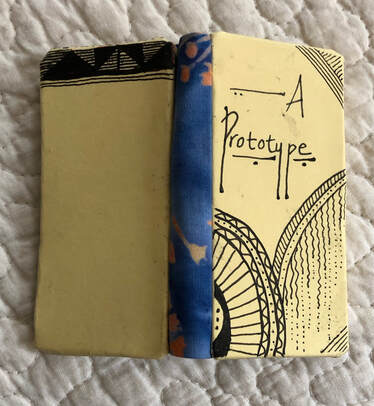 My first "BittyBook," complete with some pretty major errors. Still cute though. My first "BittyBook," complete with some pretty major errors. Still cute though. On the left here is my hilariously inept first attempt at making a "Bitty BookZ™," a tiny book of Zentangle® tiles, invented by Chris Titus, CZT. Trust me, these can be truly gorgeous. But not this one! Chris doesn't have a website so I can't link you to her beautiful work with her own Bitty BookZ™. My aim was to learn the process today, nothing more. The point was to build one prototype in which to make all the errors I was sure I would make, and then from here on I can actually create some nicer books. I hope. These Bitty BookZs are created with ten 3.5" tiles, so I started by picking out ten of my very earliest tiles from years ago when I was first learning to tangle. These are tiles that show where I was when I was learning, and some of them are...shall we say...uninspired. But it's always great to have my own early tiles to show students when I teach. So I used almost all old tiles for the prototype. See below to see the tiles in their new roles as pages in my finished book.
For some reason I was really apprehensive about trying this. And I did make some hilarious errors. For example, when I glued the paper on the front cover I got glue on the "right side," and then I had to do some tangling over it to cover up the worst of the mess. It's still a mess in some of the blank spaces on the cover, just look. But the cover paper on the back side was the worst mistake--I didn't look at it before applying glue, and discovered to my horror that I had glued all over the right side and therefore exposed the wrong side, which had commercial printing on it. But...in true "There are no mistakes" Zentangle fashion, I tangled across the top to cover up the printing. That's why there's an odd dark horizontal strip across the top of the back cover. And then there was the cover-paper in general--I used card-stock for the covers. Whoa, never again! Too stiff. What was I thinking? Fortunately I have thin decorative papers and lots of fabric scraps for the next Bitty BookZs I make, which should render the entire process so much easier. Live and learn. All in all, I'm glad I worked up the nerve to try this on my own. "My mistakes are my life." --Samuel Beckett |
ABOUT ME I'm a textile artist (traditional rug hooking, punch needle rug hooking, and other textile arts), a long-time meditator, a certified meditation teacher and coach, and focused on learning about the interplay of art, creativity, and mindfulness every day. 
Certified, 2021
Certified Unified Mindfulness Coach

Certified Zentangle® Teacher, 2013
Certified by AmyOxford.com at The Oxford Rug Hooking School, 2016

Categories
All
Archives
July 2024
SITES TO WATCH:
Insight Meditation Society Oxford Rug Hooking School Zentangle: The Official Site Green Mountain Rug Hooking Massachusetts Tarot Society 

|
 RSS Feed