|
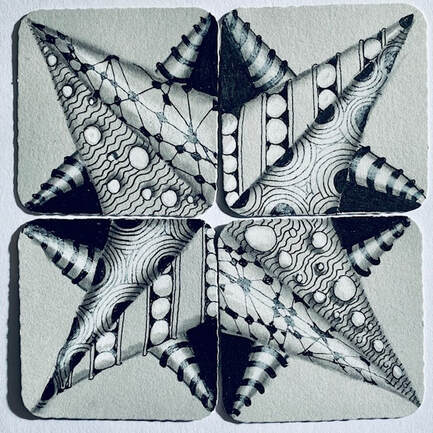
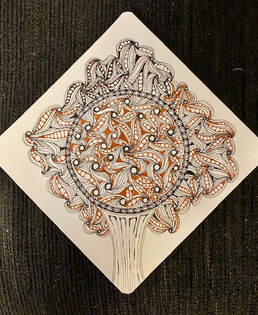
Continuing with zenAgain21: Here's a Dali-inspired tile. Mine looked quite different from those done by others (they were better at listening to the directions). 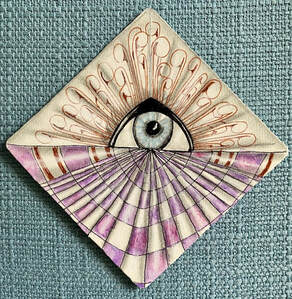 I know, scary stuff, huh? "When we are asleep in this world, we are awake in another." - Dali He's not one of my favorite artists, but this was a fun idea to experiment with. This was done with brown and black microns, graphite, watercolor pencils and white chalk pencil with a touch of white gellyroll on a 3.5" white tile. Somewhere during the four days, we worked on an Opus tile (10 inches square). I have plans to re-do this one, since I liked the idea but felt a bit too rushed during the execution. It was fun though. 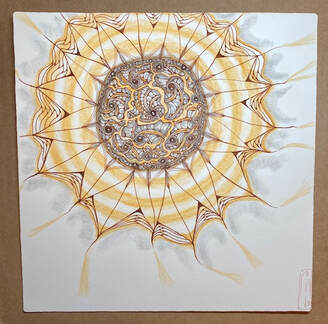 Done on a 10" square Opus tile with black and brown microns, graphite, ochre chalk pencil. I have a few other things to finish or re-do, so that's it for now. What an opportunity. To be tangling for four days straight was just wonderful. And exhausting. As Molly Hollibaugh says, "Drawing is a physical act." True!
 Gray Zendala with Micron 01 and 05, watercolor pencils, and white gellyroll. Tangles: Naaki by Nadine Roller CZT and LunarFlux by Debbie New CZT. 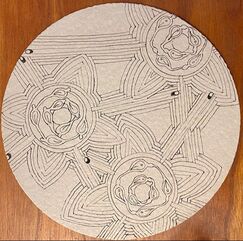 My linework before coloring. It felt great today to just sit and tangle awhile. Quiet and relaxing. I'm rusty but the annual 'Inktober" Challenge adapted for tanglers got me going and I couldn't be happier, even though we're already nine days into the month. I plan to do what I can and thoroughly enjoy doing it. It's good to be back. 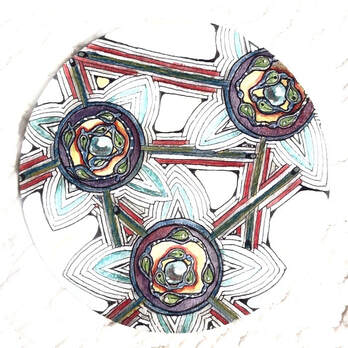 Ran the first photo thru an iPhone app. Stark, but interesting. Sort of Steampunk-y. 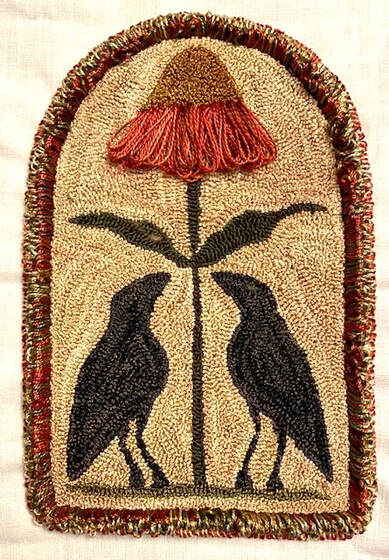 Why "done but not finished?" Because this is the piece that I'll be using to demonstrate finishing at the class I'm giving a couple of friends on punchneedle embroidery. The punching is done; the finishing will wait for the class.
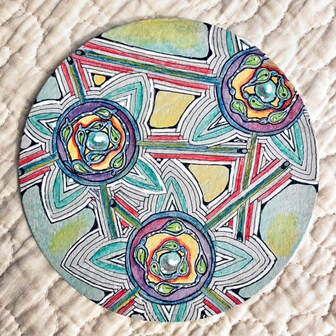
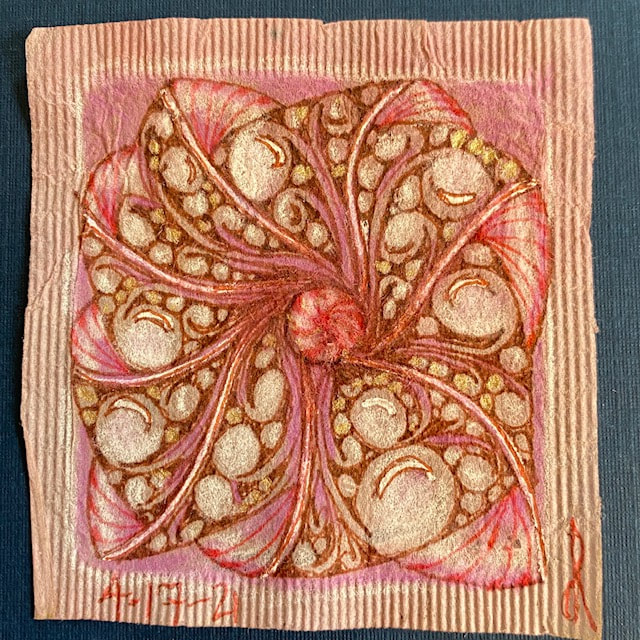
If you look at this sample, there are some loose threads that have popped up on the front and need to be trimmed. That's one part of finishing a piece. On the back, which can't be seen here, there are many loose ends to trim. And there are two other major finishing techniques waiting to be done--I'll use this sample to demo at the class. This pattern is GREAT for beginners--not only do you learn to punch, but there's some additional hand embroidery involved (the red petals on the echinacia flower), plus the border is punched using a deeper height on the needle, which gives newbies a chance to see what punching much longer loops will feel like. The design is simple enough for a beginner. This is the Old Tattered Flag's design called Under the Blooms. You can even buy it as a kit with all the threads required. Highly recommended if you want to learn punchneedle embroidery, or if you plan to teach it. 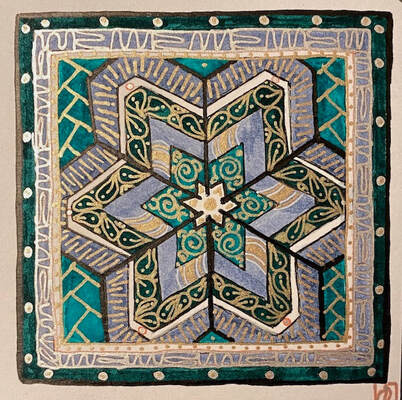 The people we tend to call Huichol in Mexico (they call themselves Wixåritari, or, The People) have a long history of art. I've admired their beadwork, small glass beads pressed into wax lining the bottoms of gourd-bowls and other objects coated with a thin layer of wax, using bright, bright colors. Check it out at the link above. They work in many media in addition to beadwork--textiles, paintings, et cetera.
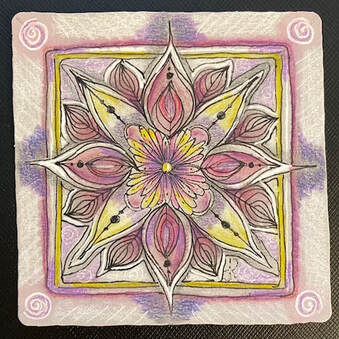
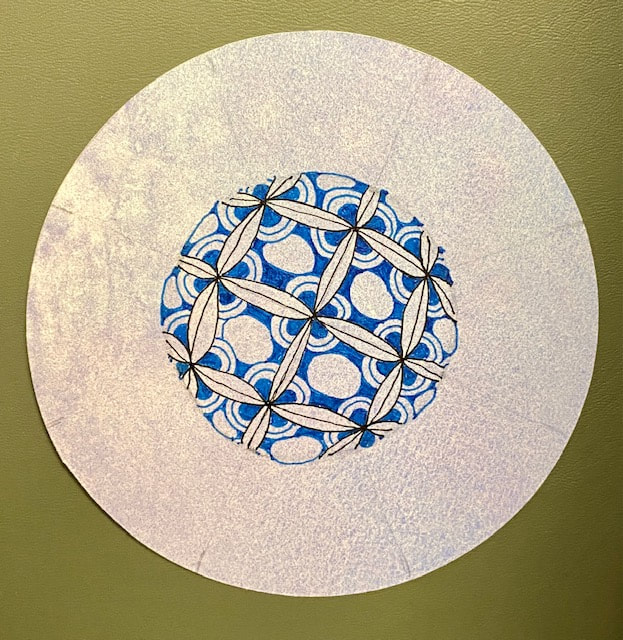
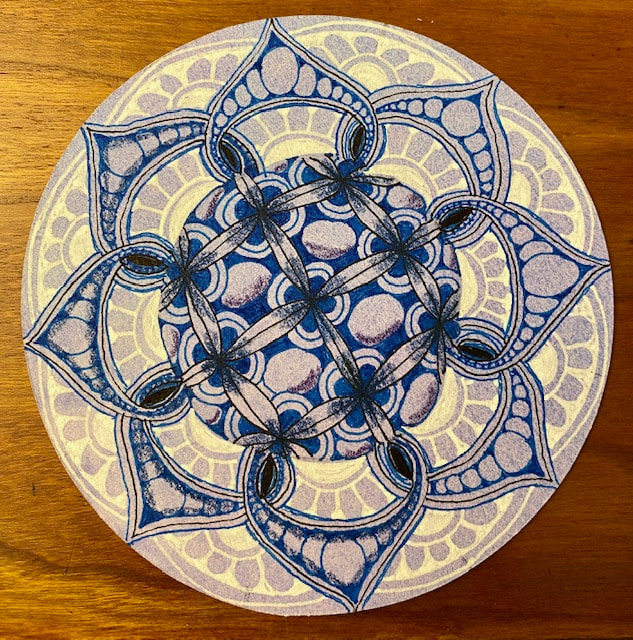
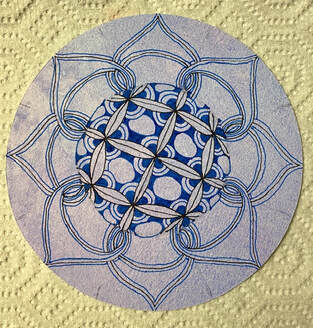
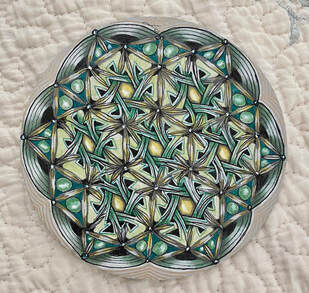
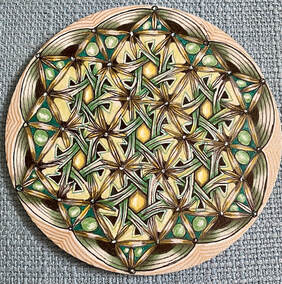
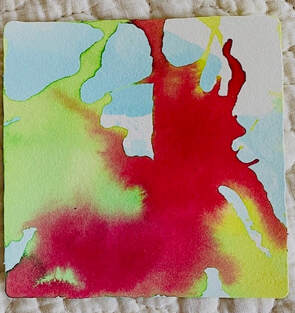
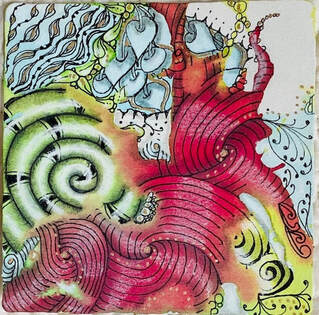
This tangle is based on a shape common to their culture and others. We see it in quilting patterns everywhere, and in many other cultural contexts. Mexican CZT Celina Bonilla Martin gave a class using the form as a template. I decided to go with a different colorway and did my own thing. Tangles included: Printemps, DoDah, Wadical, Umbler, Flux, Ko'oke'o. What interested me was that most of the way through working on this, it looked like it was going to turn out as an epic failure on my part. It looked horrible. I wish I'd taken photos during the progression. And then I began adding the tangles and it turned around. While it may not be a masterwork on my part, I quite like it now. How many times have I said that here, and drawn a parallel to daily life? Trying out new things often brings on a feeling of, "Oh my god, this is never going to work," and then somehow it turns out better than expected. And with practice, we just learn more and get better and better. This is certainly not true in all situations in life, but it's the case far more often than not. The critical mind is always predicting epic failures. Just ignore it. See what happens instead. 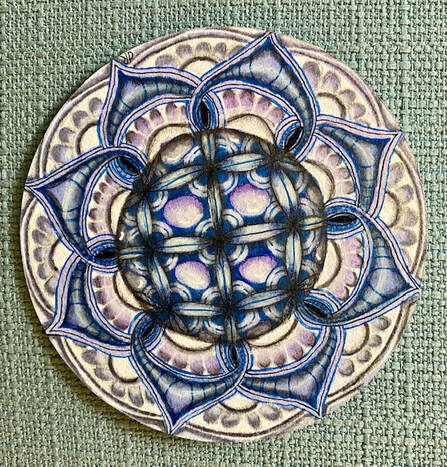 Tangles: Waybop and Bales, Crescent Moon, Orbs. Blue and Black Micron 01s, graphite, white chalk pencil, Inktense Watercolors, White Gellyroll #10 on a Zendala white tile previously colored with a watercolor wash as an underlay (lavender). I'm turning into a major fangirl of CZT Emiko Kaneko, who has a fantastic Youtube channel and shares her teaching there. This (above) is my version of one of her lessons after watching one of her free videos. Here below are a few of the stages this mandala went thru on its way to completion. I photographed as I drew. What a calming experience.
One line at a time. Stay present. Cultivate patience. Enjoy the moment. Mistakes? What mistakes--a mistake can be addressed and learned from. Appreciate appreciate appreciate. Hold the pen (hold things) lightly. I love the lessons I learn from Zentangle®; they're directly applicable to meditation, to daily life, to just about everything. It's hot and humid outside, not my preferred weather. Demotivating. However, I see the value of "warming up" in other contexts, like when doing any kind of art. Warming up = doing anything mental and/or physical to get oneself going. Even sitting down for only ten minutes when there is supposedly NO TIME. Here's last night's warm-up below, a quick tangle done just before sleep, inspired by the Sunday night Tangle Time with Amy Kam. 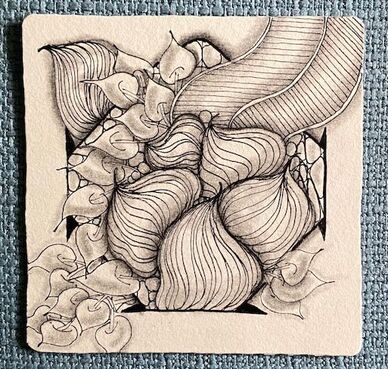 Meringue, Pokeleaf, Meer, N'Zeppel tangles. Micron 005 and graphite. This morning I noticed I didn't want to meditate. Not. At. All. So I applied the warm-up idea to meditation, telling myself that I only had to sit for ten minutes. And reminding myself that I could look right at the resistance the whole time if I wanted to, and that everyone has resistance at times. I did, and of course discovered that I easily meditated for my entire usual time (way longer than ten minutes) and enjoyed it. Yep, warming up...I may not like it when the weather does it, but it's pretty darned handy for the arts and for meditation. After warming up today, I did this: 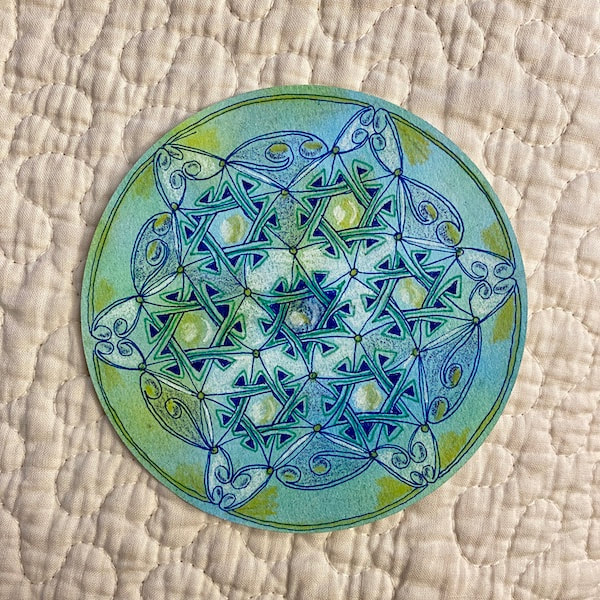 Zendala tile with a watercolor wash. Tangles: Tisoooh, Mooka. Blue and green Microns, General's Chalk Pencils. I'm not sure it's finished yet. Probably is.
This was my second try at drawing Tisoooh (see my first attempt HERE) and I could not believe how much easier it was. So much easier! I want to continue to explore. Thanks to my friend Susie Ng in Thailand, who actually tried the same video I described in my previous post about it and then went good-crazy into experimenting with Tisoooh on her own. You can see her amazing results HERE (scroll down until you find them but prepare for a visual feast along the way). Susie is a phenomenal artist, as you'll see! 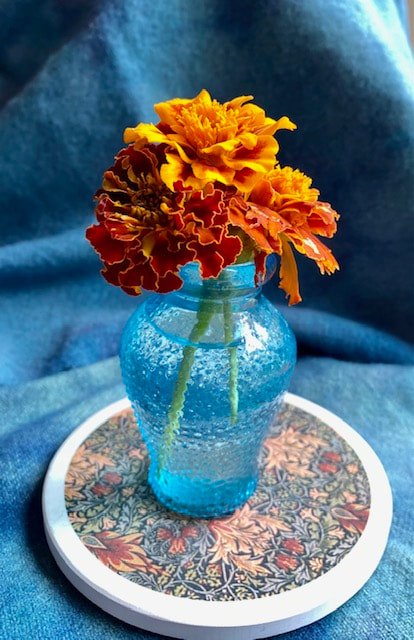 A kind neighbor brought these marigolds in a tiny bottle. She collects old bottles and also grows flowers. A wonderful combination. I could actually have given this post a much longer title. Something like: "Kind Neighbors, Marigolds, and Other Favorite Things." Too long. 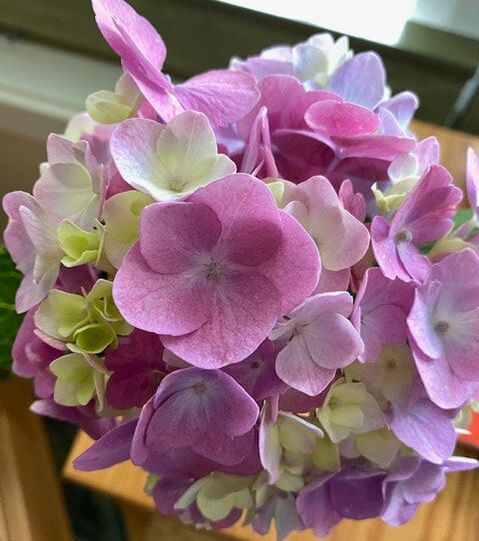 Oh my. She also brought me this hydrangea bloom. Can I say "Oh my" twice here? 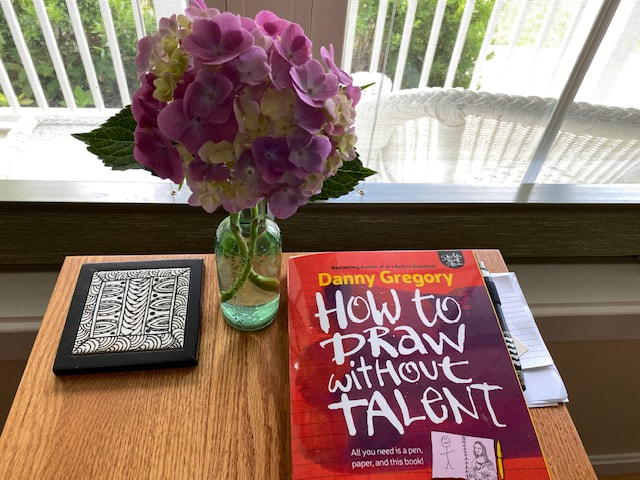 Some of my favorite things. The hydrangea in an antique bottle, a book on drawing (recommended), and an old white soapstone I tangled years ago and put into a frame to use as a coaster, after first baking it in the oven to set the paint. Plus, my front porch. Love to sit out and watch the world go by. 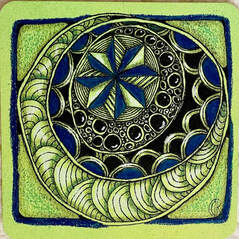 Finally, a quick late-night tangle I did last night after watching Amy Kam's weekly Tangle Time. The tile had been given a watercolor wash years ago. I added the tangles (Gneiss, Black Pearl, Crescent Moon, Shattuck), along with colored and chalk pencils and graphite. I threw in some white gellyroll. And I still couldn't sleep--however I didn't wake up this morning until almost nine. Oooh, a lovely sleep after all. Once it actually came.
 New-to-me tangles in this tile: Dealys and Yerba, both by Debbie New CZT. New-to-me tangles in this tile: Dealys and Yerba, both by Debbie New CZT. Today more than a hundred CZTs from around the globe gathered online with CZTs in Singapore to do an hour-long meditative tile on behalf of those who have suffered from Covid-19. These were the same CZTs who last year donated $10K US and this year donated $12K US to Covid relief efforts as a result of their two very successful and well-run schools for tanglers. What I loved about doing it, though, was that 3 or 4 different CZTs from the other side of the globe led us all through an hour-long meditation in which, as we drew, we focused our compassionate attention on anyone who has suffered from Covid. They did a superb job leading the meditation. I so admire the structure they've created to support humanitarian efforts. Thanks! And now for the tiny treasure. Yesterday I went to my local bead-and-jewelry-repair shop to get my watch battery replaced. While waiting, I spotted this wooden box, which is no more than about 1 1/2" square. With what appears to be a tangled Turtle on top. 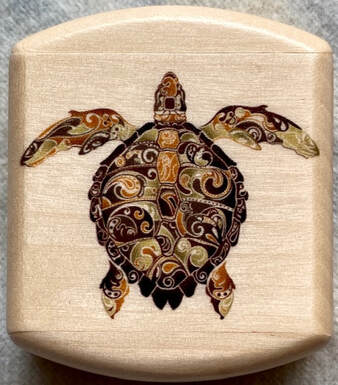 In fact the box is so small I had to take a picture and enlarge the photo in order to see the fine detail on the turtle, which just blew me away. The top of the box slides off so smoothly it's just a marvel of craftsmanship. It's so small that I cannot imagine what to put inside. This continent was originally called Turtle Island by the First Nations People, and I still call it that. I am very fond of turtles and simply couldn't resist this tiny masterpiece. And this leads us right back to the meditative nature of the turtle: Take a walk with a turtle. And behold the world in pause.
-Bruce Feiler Looking for peace is like looking for a turtle with a mustache: You won't be able to find it. But when your heart is ready, peace will come looking for you. -Ajahn Chah Turtles always strike me as devastatingly serious. If turtles could talk, I'd believe everything they said. -Erin O'Brien 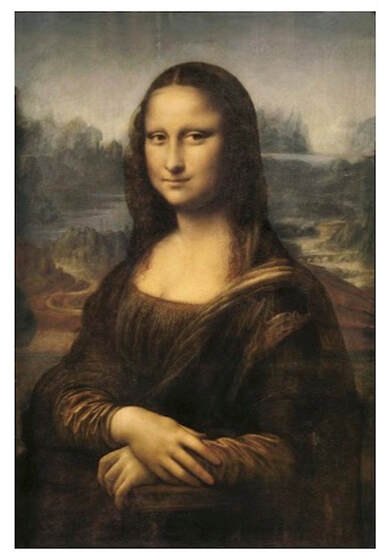 Here she is, the icon. The original. The exquisite. But since nothing is sacred these days... 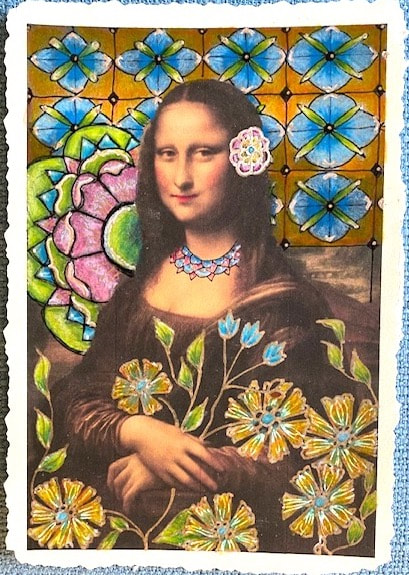 She apparently was photographed attending a party shortly after posing for Leonardo. This is her "riotous party smile." Uh-oh. I know this is a sacrilege, right? But what fun to try. Romi Marks had a wonderful workshop called "Zenovating the Mona Lisa," and since I'm in full-on learning-and-practice mode I wanted to take it. My motivation actually was learning to tangle on photographs, especially on photographs with a lot of dark areas in them. I want to try this out on pictures that I've taken, and I knew there were tips I needed to learn first. Romi is a marvellous teacher and I learned a lot doing this. Next I want to try some of my own photos to see what I can do. So many art opportunities, so little time.  And then, of course, after the party Mona needs to relax. I'm sure you've all seen this meme going around, depicting what Mona has been getting up to at the Louvre since it's been closed due to the pandemic. Wish I could find the original source to give this the right attribution but so far it's been shared so many times I don't know who came up with it. A little alarm now and then keeps life from stagnation.
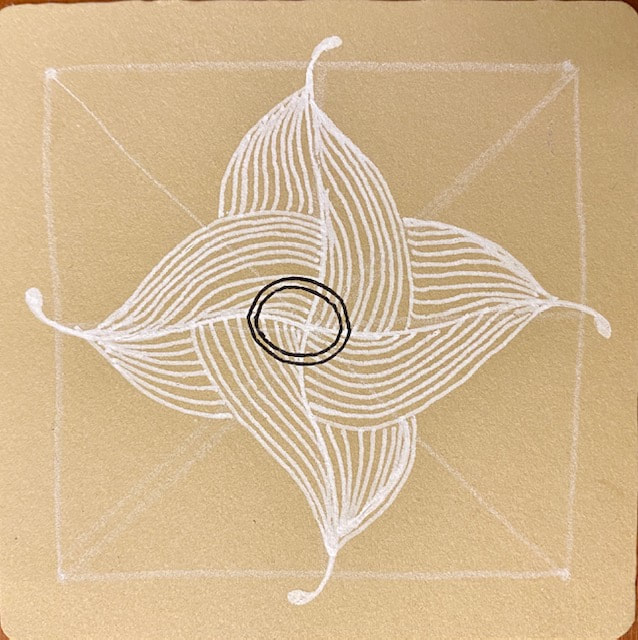
--Fanny Burney 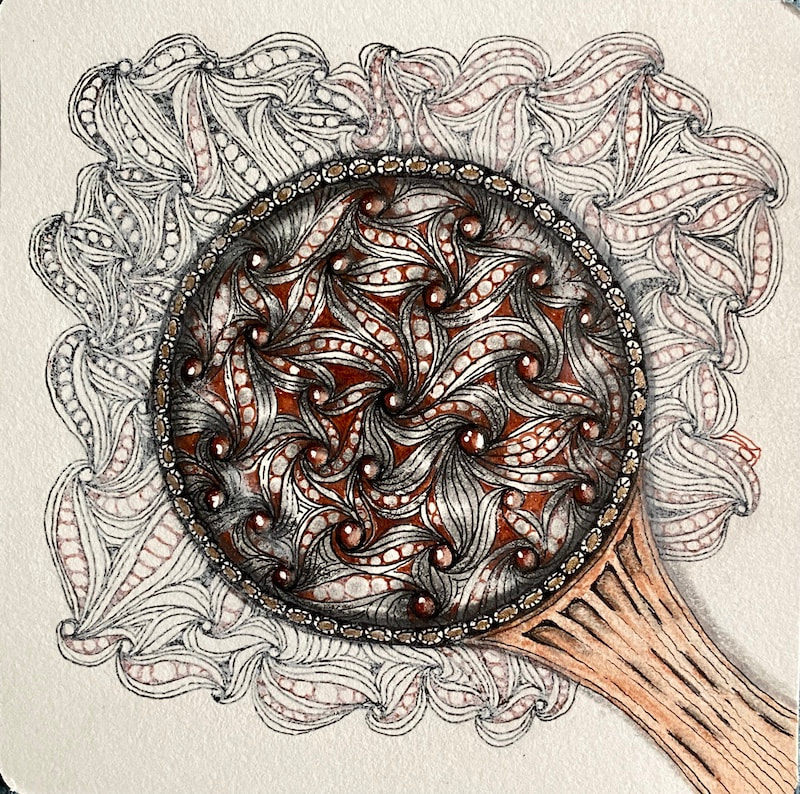 Black and brown Micron 01, graphite, watercolor pencils, colored pencils, white chalk pencil, gellyroll pen in white, Koi gray brush pen, waterbrush. This was my interpretation of a well-done class by Vandana Krishna, CZT in Bengaluru, India, as a part of the Artifex series I mentioned in the last post. While I'm not sure my version actually looks like a magnifying glass, I really enjoyed the process. On a night when--for no obvious reason--I simply could not get to sleep, working on this tangle was relaxing, fun, and absorbing. I have occasional bouts of sleeplessness, and am so glad to have drawing to occupy me when it strikes. Here's how it looked when I finished the linework, and then on the right is how it looks after adding some color and shading. There's currently a big boo-boo in the center of the tangle (I'll probably fix it at some point), which I left in place for now. You can see it in the large version--a misplaced black line.
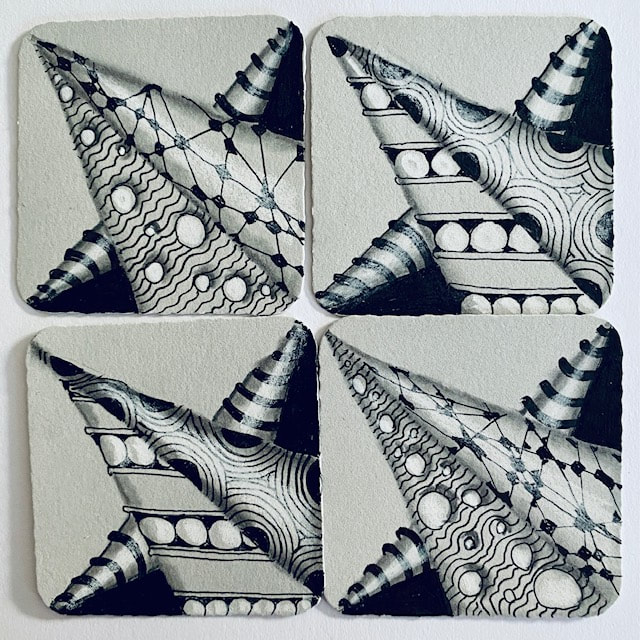
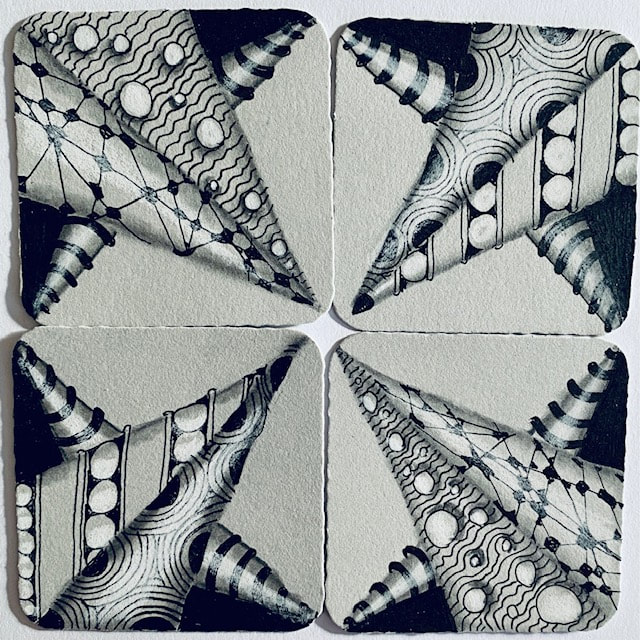
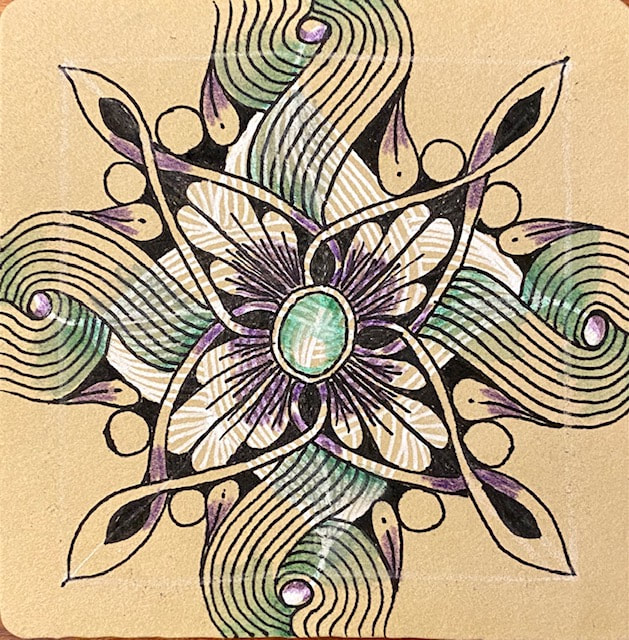
In my next life I will try to commit more errors. (Jorge Luis Borges) "There are no mistakes in Zentangle." (Maria Thomas and Rick Roberts, Zentangle® creators) 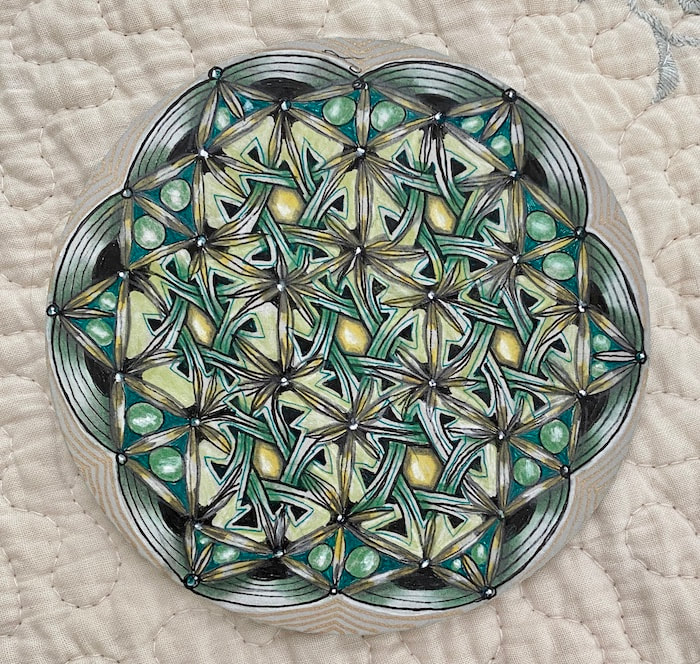 A tangleation of Tissooh. Done on a gray Zendala tile with 01 green Micron, PN Black Micron, graphite, General's chalk pencils, white gellyroll, gold gellyroll. I love the life lessons I constantly learn from Zentangle®. This was another big one. I set out to draw one thing, ended up getting hopelessly lost, and by the time I finished the preliminary linework last night and forced myself to stop and go to bed, I was looking at a hot mess. I didn't think it could be salvaged. But this morning I just had to keep going to see what would happen, and ended up with this--which I quite like. [Although it does bear a resemblance to "St Patrick's Day on Steroids," don't you think? But that's ok, I like it anyway.] ******************** Here are the details for you tanglers out there (no need to read this part if you don't tangle--it could be boring for you): I fell in love with an Emiko Kaneko CZT video (HERE)* and thought I'd give it a try. But I misunderstood what it was: She clearly labeled the video "A Tangleation of Tissooh," but all I saw was "Tissoooh," which is a high-focus tangle by Tomas Padros CZT that I've always wanted to attempt. Emiko made it look so easy that I was sure I could do it and learn. Well. I did indeed learn, but not as she intended! Mine has some resemblance to hers, but I ended up with a lot of weird space in the background, and things are not in the same places as on her tile. So did I learn a lot? You bet. But now I need to go back and find a simple stepout for ONLY Tissooh and have a go at that one tangle--this tile combines Tissooh with something like Bales, Tripoli, and Orbs. However, I do love my outcome. For years I've heard that it's lways good to learn by copying the masters, and Eri is certainly a master of this art. For me, the biggest learning is that no matter how bad something looks, it's highly likely that it's worth it to try and save the thing. Or as the I Ching would say: "Perseverance furthers." *Thank you to Susie Ngamsuwan for catching the fact that I'd attributed this tile and video to the wrong CZT. Wow, much appreciated. ******************* Note: I've been doing a LOT of copying lately, along with watching videos and going along with them. I always credit people as I'm copying. I'm on a mission to learn from a wide variety of tanglers whose skills I admire, and if that means I am copying for awhile, that's ok. It's a powerful way to practice. Here are three quotes about copying as an effective tool in learning art: It would have been the equivalent of Jackson Pollock's attempts to copy the Sistine Chapel. (Malcolm Cowley) But Shakespeare's magic could not copied be; Within that circle none durst walk but he. (John Dryden) If my students seem to copy me when they are learning, that is good. It shows they are listening and trying to do what I tell them. They will develop their own style soon enough. (William Draper) ********************** Finally, I took these two photos only one minute apart. The first one, on the left, was taking on a white background in indirect daylight. The second one--using the same camera with no setting changed--was taken a minute later on the blue background and in direct sunlight. WOW--look at the difference! It might as well be two different pieces, but it isn't. Isn't that incredible! It never fails to amaze me how light and a different color in the background can make the same thing look totally different. PS: The one on the left is the actual coloring of the tile.
Looking out the window this morning, I noticed the back yard appeared to be covered in light snow, but of course it was merely cottonwood puffs adhering to the grass. Everywhere. It's that time of year again, when we have a blizzard of them floating gracefully down to earth. As I look outside just now, I see them coming down at the rate of a snow-squall, despite the late spring warmth and the heavily leafed-out trees. From what I recall, this goes on for weeks. Two weeks? Three? This area was (and still is) a major source of poplar wood. The leaves of the poplar (another name for the Cottonwood) are somewhat heart-shaped and may have inspired the following tangle. Or not.   Tangles: Mooka, Orbs, 'Nzepple, Shattuck, random lines and a Celtic Knot. Micron PN and 01, white chalk pencil, graphite, colored pencils, gold gellyroll. This was inspired by a class from this spring's "Artifex Eruditio," (Latin for "Art Learner"). Actually the class sample looked absolutely nothing like this--I went entirely off-road as usual, so mine doesn't look like anything that was taught in the class. I did some of the line work yesterday, more this morning, and then added color this afternoon.
I am not usually fond of using hearts in my pieces, so I'm blaming this on the fact that it's Cottonwood Season. The most closely-watched trial in this country in a long time ended today, with three guilty verdicts. Perhaps this signals the beginning of some kind of reckoning for racial injustice in this country. There is so much work ahead. I put my head down and sobbed when I heard the convictions--relief, and sadness. All mixed in. *** Allow me to change the subject completely, as I do not want to get into the habit of posting political thoughts--that's not the focus of this blog. So there was another ending today: I finished this rug, which I've been struggling with for quite a while. I had one color scheme in mind, and it didn't work out. Not. At. All. Which meant I had to rip out a large proportion of the rug, think about what else might work, and then re-hook a large proportion of it. I did, and just finished binding it today. Next I gave it a good steaming and took a picture. Tonight I'll sew on the label. Hurrah! 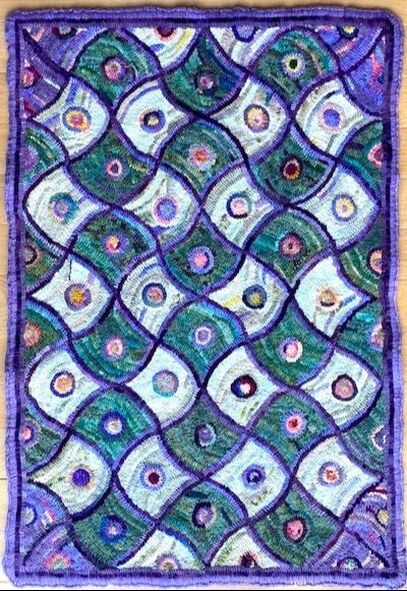 Pattern available from W.Cushing & Co, Wells, Maine. Completed in 2020...yes, a pandemic rug. Pattern available from W.Cushing & Co, Wells, Maine. Completed in 2020...yes, a pandemic rug. The pattern is by Pearl K. McGown; I at first thought it was a very early design of hers, done while she was still in her early "geometric phase" and before she started designing the florals for which she's better known.
Later I discovered it's actually one of the last rugs she designed--another spate of geometrics named after her grandchildren, one of whom is named Duncan. I did the color planning--much trickier than it sounds, as I mentioned above--and of course I did the hooking using largely #8 strips (with a few 6s and maybe even some 5s) from my stash. I bought a few scraps, but nearly all the wool (some of which I dyed) was from my stash so this rug didn't require more than perhaps a total of one yard of new wools. If that. There was a LONG period as I worked on this where I was aiming only to "get it done," thinking it was so ugly that I'd never want to see it again. But now that I've changed the colors and done a lot of re-hooking, I like it. My "Duncan" was inspired by one I saw in 2009 at a rug show of the late Lida Skilton Ives' work. The show was held at UConn in Storrs CT and the "Duncan" Mrs. Ives did stopped me dead in my tracks--I fell in love on the spot and knew I would hook it one day. Gee, it only took me twelve years to start my own version. Mine doesn't resemble hers one bit, but she completely inspired me. Thanks also to my friend Kathleen H who, when she saw the photo of the Ives rug, told me it was a McGown pattern--I would never have guessed. And Kathleen had already hooked her own version before we ever met, and since then has hooked a second one. Phew. The beginning? It's time to begin cleaning up the mess the production of this rug generated. And to begin a new rug. I have just the one, ready to put on the frame. Here is the "mystery" from yesterday--solved. Joanna Quincey of Zenjo taught a quick class on Teabag Tangling Now you know what I was doing with that mess of teabags in my previous post. (PDS: thanks so much for collecting for me, since I don't like or drink tea! I have enough to keep me going for a while.) Jo is a terrific and inventive teacher. Here are my first tangled teabags. 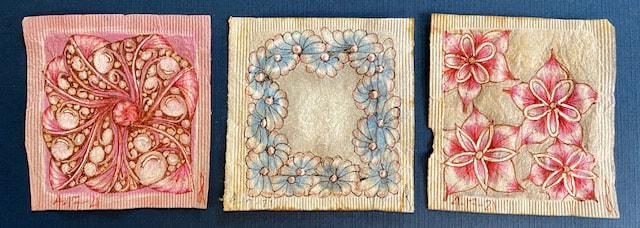 The trio we completed in class today.
Massively fun to try out! Thanks, Jo.
Here is the "before and after" on my first Ecoline Watercolor Map Tangled tile. I'm curious to look at them side by side. Is the tangled tile an improvement, not as good, or is it about the same in its appeal? I had my doubts about tangling on it as I loved the plain tile.
I like them both but think I'm favoring the tangled one. Which surprises me.
Thanks, Annie Taylor CZT for great tile prep instructions and fun class! I loved the room you gave students to use whatever tangles we wished, while making good suggestions. And for your linguistic talents at teaching simultaneously in English AND Spanish! Wow. "If you've heard this story before, don't stop me, because I'd like to hear it again." --Groucho Marx 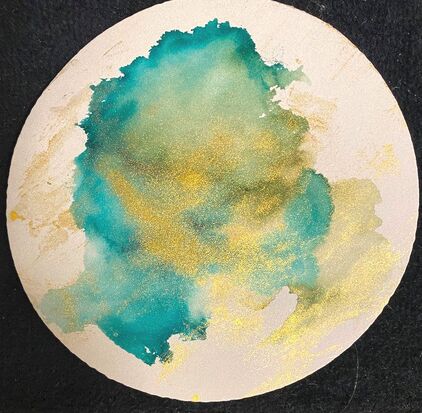 A Zendala tile prepped and waiting to be tangled. I almost don't want to do any tangling on this one--I just love the look of adding metallics. I'm leaving it to think about for a good while. Watercolor paint and Fine-Tec Gold Metallic mixed a la MapTangling Method. I did this the day after a class on using the metallics with Map Tangling. Class details below.  This is another MapTangled Zendala, mixing watercolor + metallics and then tangled with a new-to-me tangled called SeaWave. Done during a class with Nancy Domnauer on Metallic MapTangling. 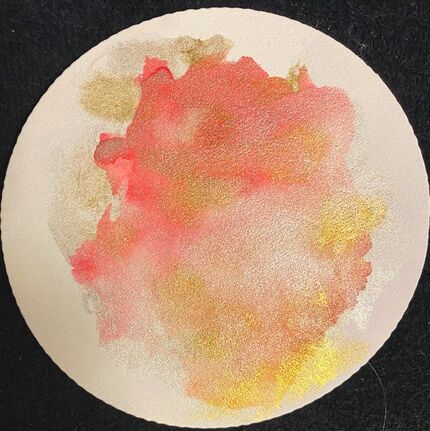 Another metallic MapTangle-prepped tile waiting for some decisions about what to tangle on it. Did this one on my own the following day. 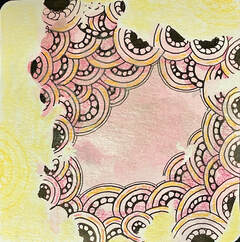 Also done during the class. Prepped with a pink watercolor MapTangled base and then mixed with Silver FineTec paint, then tangled using Crescent Moon. I added some Lemon General's Chalk Pencil to the very large white space surrounding the MapTangled part. After taking the class with Nancy Domnauer, during which we prepped and completed the tangling on three tiles (I only showed two of those), I spent just a few minutes the following day to produce the two UN-tangled tiles above. I'm learning as I go. People get obsessed with MapTangling, and I can absolutely see why. It's a surprise every time; results are always unexpected and ever-changing. Just like our day-to-day lives. But with MapTangling, results are likely to be beautiful every time, even if tangling on them can turn out to be tricky and challenging. That's half the fun. Now, if I could only learn to be as calm in daily life when presented with a challenge as I am while doing this. 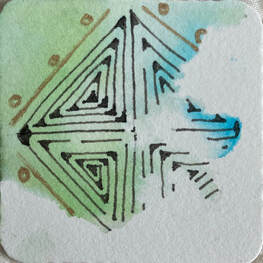 With a hint of Gold Gellyroll. With a hint of Gold Gellyroll. Here's a tiny tile I did just before bed last night. It took about ten minutes. This was done on a Bijou tile (2"x2") which I'd prepped a background on earlier in the day. This is simply more linework from one of Jo Quincy's lovely soothing videos, just what I needed before trying to sleep after a wild couple of days in my life. Once again I combined a video from Jo with my own "take" on it, by using MapTangling. Ahhhhhhhhh. 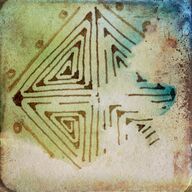 To finish up, here's an iPhone-app "distressed" version. I can never resist those iPhone apps. 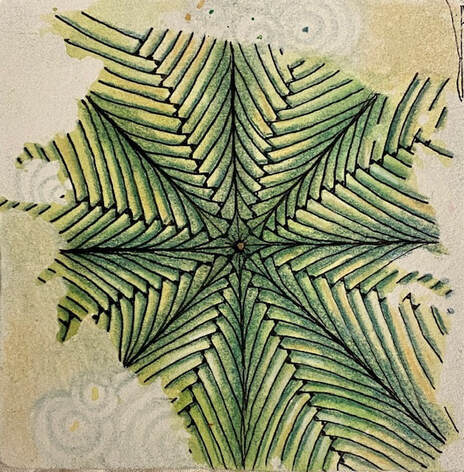 Monotangle (done in MapTangling style) of Betweed. Using Micron 01 in black; shaded with General Chalk pencils. Shadow tangling in the background just using a tortillion (same tortillion used for shading, so had some shadow color on it from the chalk pencils). Inspired by Zenjo's YouTube video. Monotangle (done in MapTangling style) of Betweed. Using Micron 01 in black; shaded with General Chalk pencils. Shadow tangling in the background just using a tortillion (same tortillion used for shading, so had some shadow color on it from the chalk pencils). Inspired by Zenjo's YouTube video. I noticed my British friend and teacher extraordinaire, Jo, has a YouTube channel (why didn't I know this before?) and I took a look today. She did a lovely job demo-ing one of my old favorite tangles, Betweed. I've loved this tangle forever and used to use it all the time. Why did I stop? Like a lot of things, it just passed out of my consciousness at some point and I haven't done it in years. What a welcome reminder. I had time to experiment this afternoon and decided to use her video to do this monotangle version of it. Soooooooo relaxing. But rather than do it plain, as she did, I used a tile I had previously prepped for MapTangling, and used that as a technique. Well then I couldn't leave well-enough alone so I did some shadow work in a couple of the negative space surrounding the motif. This was totally fun. I liked the depth and subtlety. Ah, but I thought I might run it through an app on my iPhone to see how it would look. Holy crow! It went from subtle to glaring. You had better wear your darkest sunglasses for this version below (altered by the iPhone app). 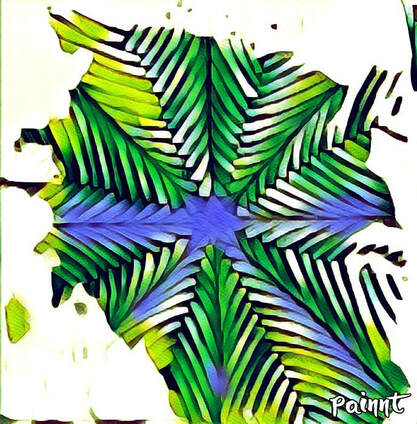 Same photo as above, altered by a filter on the iPhone app. Yikes! Very bright and the background shading is gone. Once I start playing with the iPhone to alter a photo, it turns into a project all on its own. Using another iPhone app, I came up with all of these:  Variation #1. Like the distressed look of this one. 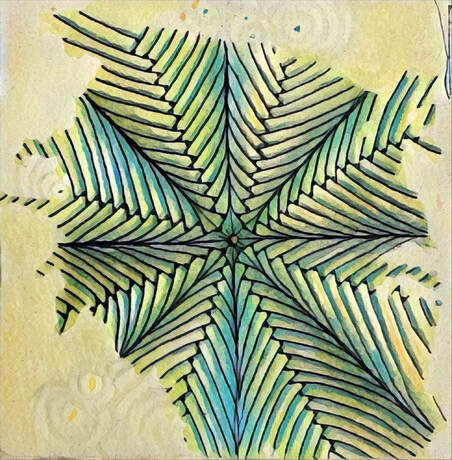 Variation #2. Somewhat smeary but I like it, and can still see the shadows in the negative space. 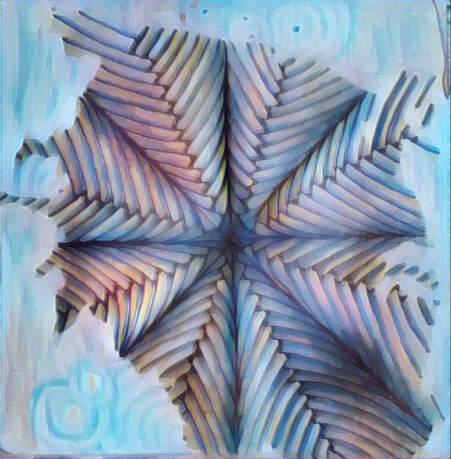 Variation #3. This was a surprise! Much smearier and closer to a painting, but I like the altered colors and negative space shadows.  Variation #4. Also fun use of different colors and the effect it had not only on the tangle but also on the negative space. There is something to be said for each of them. Besides, it's so much fun being able to play with alternatives. It's even more fun greeting an old friend--this tangle--one I haven't seen for awhile. I imagine we will all feel that way once the pandemic is over and we are able to see each other in person again. We can Zoom, and that's helpful, but to be able to spend time with old friends and hug each other again...priceless. “Friendship is the only cement that will ever hold the world together.”
– Woodrow Wilson “A day without a friend is like a pot without a single drop of honey left inside.” – Winnie the Pooh Yes, it really looks this way. This exquisite photograph of the Grand Canyon at Sunset was taken on the Martin Luther King Holiday, 2021, by Michael Quinn, a fabulous National Park Service photographer who has lived at the Canyon forever. I think it speaks to his heart. It certainly speaks to mine. 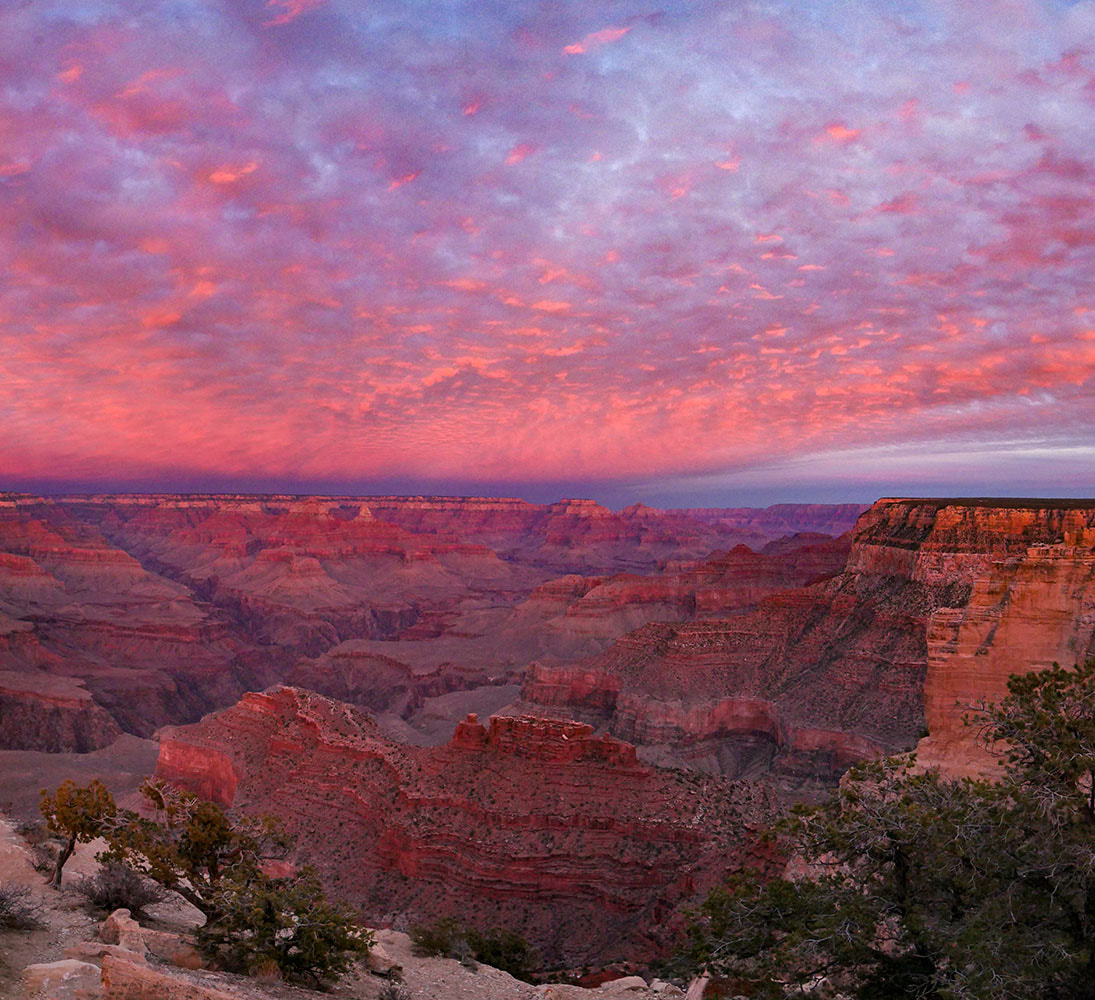 Photograph by Michael Quinn of the National Park Service, January 2021. Grand Canyon Sunset. Eating Fruit at the Grand Canyon - A song to make death easy Since this great hole in earth is beyond My comprehension and I am hungry, I sit on the rim and eat fruit The colors of the stone i see, Strawberries of iron cliffs, sagebrush melons, white sand apple, grapes The barely purple of the stonewashed slopes, And every color I eat is in my vision, Colonized by my eye, by me and everyone I have known, so vast, so remote, That we can only gaze at ourselves, wondering At our reaches, eat fat fruit while we Grow calm if we can, our folded Rocky interiors pressed upwards through Our throats, side canyons seeming almost Accessible, the grand river of blood Carving us even as we sit, devouring Color that will blush on our skin Nourish us so that we may climb The walls of the interior, bewildered, Tremulous, but observant as we move Down in, one foot, another, careful not to fall, to fall, The fruit fueling us in subtle Surges of color in this vastly deep Where birds make shadow and echo And we have no idea Why we cannot comprehend ourselves, Each other, a place so deep and bright It has no needs and we wonder What we’re doing here on this fragment Of galactic dust, spinning, cradled, Awestruck, momentarily alive.” ― Diane Hume George 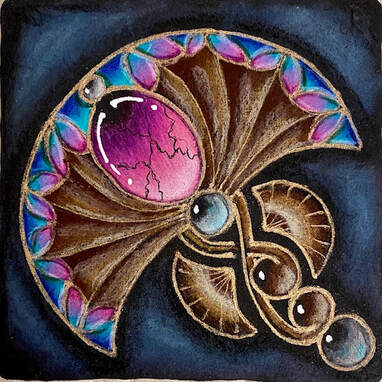 Zengems on a black tile, using Prismacolor pencils in a wide variety of colors, General's Chalk Pencils in 3 colors, and a White Gellyroll Pen #10. This is the result of a truly wonderful class with Stefanie vanLeeuwen this afternoon <@tanglestudiostefanie>. There were students from Canada, the USA, Holland, Germany, the Carribean, and Spain. We had such a good time and I certainly learned a lot. I'll be trying this method again with other forms and colors.
Every person in the class produced something very beautiful--the sign of an excellent teacher. Stefanie had everything extremely organized well in advance. I chuckle when I contrast the sense of control I have with colored pencils to the lack of control I have with watercolor; see yesterday's post for more on that. Art is truly endless learning. "Regard everything as an experiment," said artist Corita Kent. Words of wisdom. Or should that be, Rusty AND Tricky? I did some watercolor yesterday and today and wow, was the it ever hard to handle. What a mess! The result is fun but not particularly good--I say that not to put myself down, only to say I can definitely get better with practice. It's been about 3 years since I've done any watercolor practice, and it shows. Did this one in a class by Sam Taylor (@Zenlapse on IG). I'd gotten a new set of "tropical" colors and couldn't wait to try them out, so I tried them out on this warty fish: 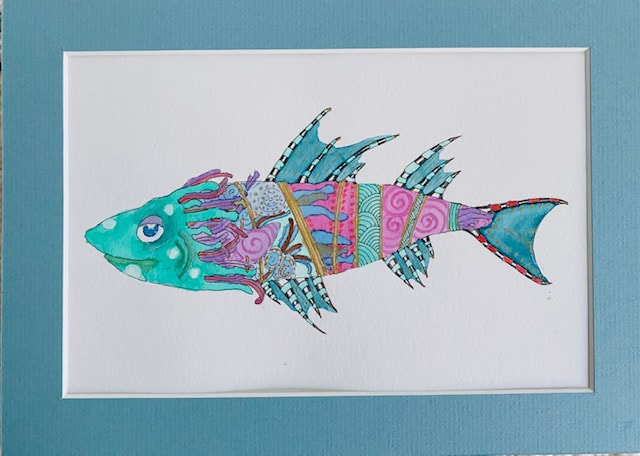 Watercolor on 140 lb cold pressed paper, 5x7". With a tad of gold Finetec paint and gold gellyroll. Tangles are Perfs, Printemps, Shattuck, Beetlejuice. It's just amazing how that darned water can get away from me. Or I would assume something was dry, only to discover it wasn't...so then I'd have one color running into the other. Or I put my hand down to draw something and would feel that sickening wet feeling under my hand--I'd forgotten that part was still sopping wet and now I'd smeared it. Yikes! Hilarious, however. Watercolor requires patience and plenty of mindfulness. Looks like it's time for me to cultivate both. I think I'll try doing another fish. Because watercolor actually moves on the paper, it is the most active of all mediums, almost a performance art. 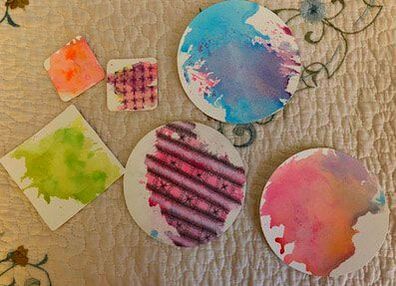 6 tiles prepped in Map Tangling style (watercolor), two of which have been tangled. 6 tiles prepped in Map Tangling style (watercolor), two of which have been tangled. For years I've heard about Map Tangling and while I had some idea what it was (see below), and had really admired it, I didn't have time to figure out how to create it. Today I took a class with Nancy Domnauer. Great fun! She's an excellent teacher. Here you can see my first attempts. We spent time preparing the tiles with watercolor (that's where the Map Tangling technique really applies) and then completing two monotangle tiles. There appear to be at least two ways to prep a tile by Map Tangling. Nancy's class focuses on one. I think there is at least one other. I will be playing with this technique for sure--I know I can get better at it with practice. 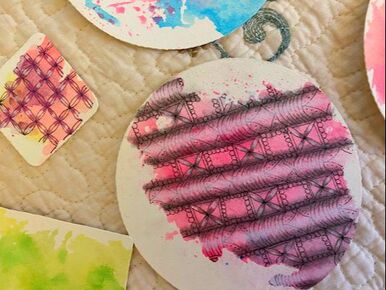 a
As shown here and above, "Map Tangling" is when a watercolor wash is applied to a tile in such a way that the colored portion is left with ragged edges., and could be interspersed with lots of white space or just have white space surrounding it. Only the colored space is then tangled. The watercolor background frequently resembles the map of a continent or country--hence the name. The process reminded me of gelli-printing. There was lots of pressing going on before the tiles were done, and all results were inevitably surprises. "Research is what I'm doing when I don't know what I'm doing." — Werner von Braun  Every year at this time I find myself looking backwards. And forwards. Today I was doing some cleaning in my art room, and I found these 12-month-old-tiles below. Bittersweet, indeed. In mid-December 2019, I was just back from a wonderful weekend with a good friend at Kripalu, drawing tangles with Martha Huggins (on the left) and Molly Hollibaugh (right) of the Zentangle® family. If this year had been normal, I'm sure I'd have done the same. But we all know it was not a normal year. So here is a short review of some of the work we did in December 2019, with the fond hope that we will be able to do something similar in 2021. Looking at these tiles brought back so many good memories for me.
 Four Bijou (2") gray tiles; in these 3 photographs you can see the fun of turning them in a variety of ways. 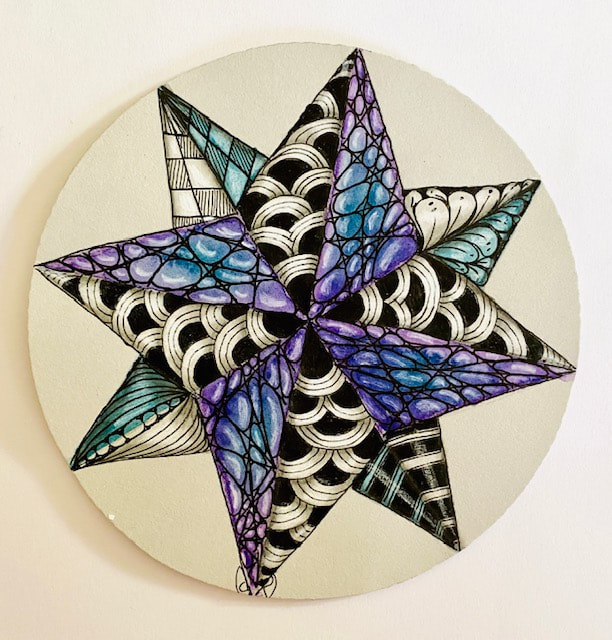 Mandala on a gray Zendala tile. This was made by folding the tile 4x to create a folded "string" to tangle on. I remember being distressed that we were folding our tiles, but now, a year later, I can barely see the folds. And although I'm not a Christmas celebrator, I just happened to get some non-Christmas presents this year (the timing just worked out that they arrived at Christmastime). Here are two that I'm thrilled by but haven't had time to try out yet. 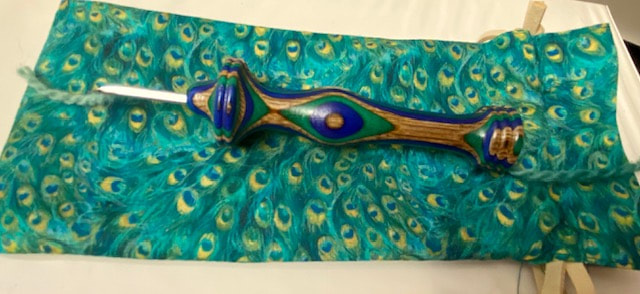 This is a commemorative but perfectly functional Oxford Punchneedle, called The Peacock. Amy (Oxford) had only 1300 of these made from laminated wood, to commemorate her 25th year in business. It's a #13 Fine size and I cannot wait to try it out. Check out the bag, made of fabric to match the needle. I love it! I gifted this to myself from myself. 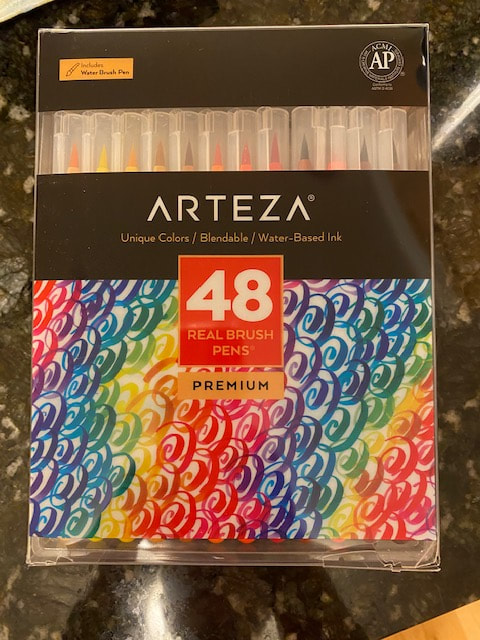 And out of the blue, an outrageously kind friend I haven't seen in way too long just up & sent me these fabulous watercolor markers. Unbelievable. "They were on sale and I thought of you," was her comment. WOW. Cannot wait to try these out, hopefully in a day or two. A friend is a gift you give yourself. Robert Louis Stevenson 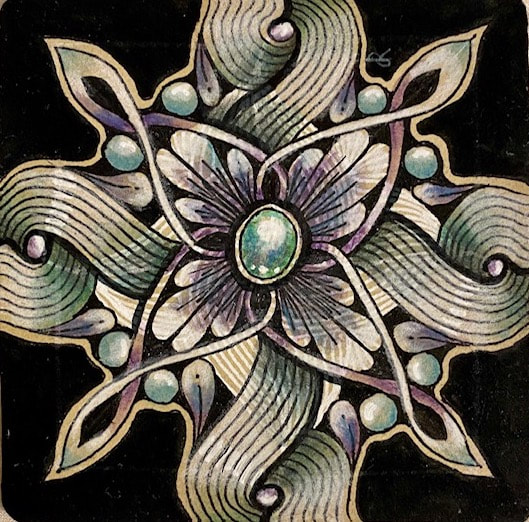 Tangles: Belle, Ratoon, Verve, Flux, Orbs, and a ZenGem. On a Renaissance (Tan) tile. Micron PN in black, Tombow Black Brushpen, General's Watercolor Pencils, White Gellyroll, White Prismacolor, White Signo Uniball. It never stops, the learning. Here I'm trying to learn a Zentangle® technique called TranZending--a form of layering one pattern over another. I've never really gotten the hang of this before, but am happy with how it turned out. I watched one of ZenLinea's videos and followed along. What I learned: for one thing, even tho she suggests some very very faint white colored pencil guidelines to start, and I did make them faint, the wax in the colored pencil still acts as a "resist" and doesn't really get colored over later on. Which is fine -- even promising -- if it's a design element. But here it wasn't meant to be a design element. Now I know. I may try this one again. Lots to learn, and I'd like to try the guidelines in graphite and see what happens. Once I figure this out, I can apply to my own future tangle designs. Here are the beginning and mid-stages of this piece:
I'm always open for people saying I'm wrong because most of the time I am. Bubble Gum Pink Anything is always a turnoff for me. However, I discovered a blank but watercolor-washed tile that qualified as that shade or something really close. Someone else had done the wash, and it was in a pack of pre-colored blank tiles I bought from a vendor at a Zentangle® event a decade ago or so. I wondered what, if anything, I could do with it when I ran into it yesterday. The color was hurting my eyes (as you'll read below, the photo actually drained out most of the eyeball-popping bright pink). Since I am so rusty and trying to get my drawing mojo back, I'm studying instructions from other teachers whom I respect, and Zen Linea certainly qualifies. So I went to SkillShare and logged onto one of her videos and tried this on the Bubble Gum Pink tile. 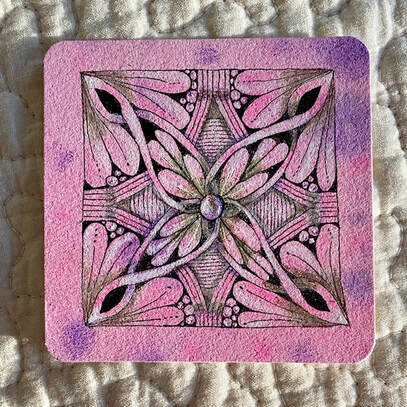 Alas, this is much pinker in person. Tangles: Ratoon, A-Frame, Flux, Tipple. Based on a video by ZenLinea. The tile was previously watercolor washed by someone whose name I don't remember. Micron 01 and PN, Prismacolor Pencils, Signo Uniball Pen. Alas, this is much pinker in person. Tangles: Ratoon, A-Frame, Flux, Tipple. Based on a video by ZenLinea. The tile was previously watercolor washed by someone whose name I don't remember. Micron 01 and PN, Prismacolor Pencils, Signo Uniball Pen. Interesting to note that in the light available when I took this photo, the "Bubble Gum" quality of the pink really calmed down. Trust me: in person, the pink is MUCH louder than it looks here. And the violet color is much more subtle. So interesting how color can photograph.
But here's the fun part. At the end of the video I was using, there was a list of projects previous students had done. Not only was I shocked to see I had done this video before, but I had done in exactly one year ago today. I had no memory of ever having done it before. Not only did I do it then, I did a second, alternative version the next day. So this version is my third. Pretty comical. 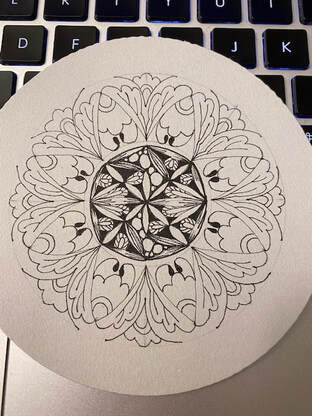 Here is the start of a mandala, just the beginning linework. I drew this last night while studying one of Romi Marks' videos. I screwed up the center--but luckily, there are "no mistakes!" in Zentangle® and so I just kept going and did my own thing in the center. And I like the way that came out. I also changed a few things in the next layer. This is one major thing I learned about drawing since I've begun to draw regularly. In fact once I began drawing in the Zentangle® tradition it was resoundingly, repeatedly, and overtly reinforced.: There are no mistakes--keep going and see what you can make of what is in front of you. 90-95% of the time, not only can you work through whatever is there but you can actually surprise yourself with a good result. It's the same in meditation. And, I believe, in much of life in general. What about that other 5-10%? Anywhere from "meh, or disappointing," to a genuine catastrophe. But still, those odds sound pretty good to me. So I persevered and began adding color. Big difference! Encouraged, I drew the outside of the tile and stopped there for a bit, having worn myself out for the day:  And here below is the finished tile. I'm glad I stuck with it. 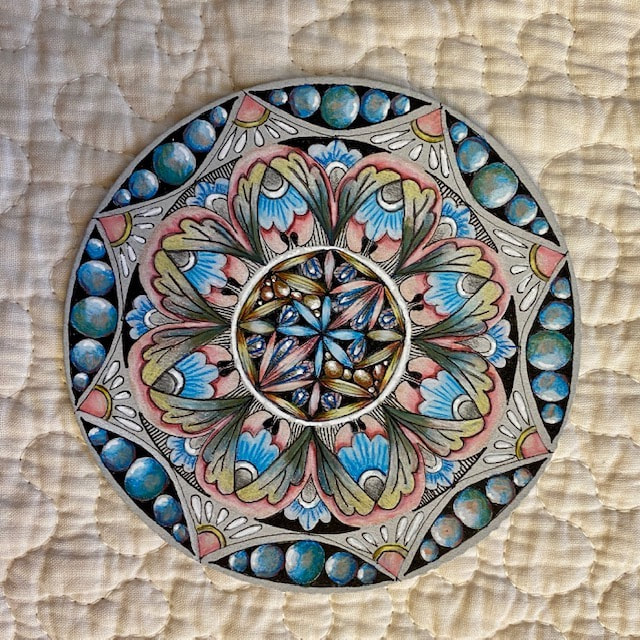 Black Micron 01 and PN, assorted Prismacolor pencils, graphite, Signo Uniball White pen, White Prismacolor on a grey Zendala tile. Black Micron 01 and PN, assorted Prismacolor pencils, graphite, Signo Uniball White pen, White Prismacolor on a grey Zendala tile. Whatever it is you are pursuing, whatever it is you are seeking, whatever it is you are creating, be careful not to quit too soon. |
ABOUT ME I'm a textile artist (traditional rug hooking, punch needle rug hooking, and other textile arts), a long-time meditator, a certified meditation teacher and coach, and focused on learning about the interplay of art, creativity, and mindfulness every day. 
Certified, 2021

Certified Zentangle® Teacher, 2013
Certified by AmyOxford.com at The Oxford Rug Hooking School, 2016

Categories
All
Archives
March 2024
SITES TO WATCH:
Insight Meditation Society Oxford Rug Hooking School Zentangle: The Official Site Green Mountain Rug Hooking Massachusetts Tarot Society 

|


 RSS Feed